Little Tikes Dueling Snow Blasters Instructions & Manual

Download PDF Manual:

Little Tikes Dueling Snow Blasters Instructions & Manual.pdf

Full Text of Manual:

Dueling Snow Blasters
For Ages
3-6 years
Item: 9335
A WARNING:
KEEP AWAY FROM FIRE.
A CAUTION:
USE ONLY UNDER COMPETENT SUPERVISION.
SEE PRODUCT AND INSTRUCTIONS FOR
ADDITIONAL WARNINGS.
MINIMUM WEIGHT 30 LBS.
MAXIMUM WEIGHT60 LBS.
A CAUTION: Adult
assembly required.
BAG OF BALLS
A WARNING: THIS BAG IS A SUFFOCATION HAZARD.
EMPTY BALLS INTO BALL PIT AND DISCARD BAG AWAY
FROM CHILDREN.TO AVOID DANGER OF SUFFOCATION
KEEP THIS PLASTIC BAG AWAY FROM BABIES AND
CHILDREN. DO NOT USETHIS BAG IN CRIBS, BEDS
CARRIAGES, OR PLAYPENS. THIS BAG IS NOT A TOY.
NOTE: PLEASE BE ADVISED THAT THE ITEM MAY DEFLATE BECAUSE
OF TEMPERATURE CHANGES. DUE TO THIS, YOU MAYBE REQUIRED
TO ADD AIR ON A DAILY BASIS.
A WARNING:
• Competent adult supervision is required at all times, responsible adults should
instruct children on proper use of this product.
• Do not allow your child to attempt somersaults or stunts whilst on product.
• Read all instructions carefully before assembly.
• Only use under constant adult supervision.
• NOT for adult use.
• DO NOT allow children under 3 years of age and over 6 years of age.
• Place the product on a soft flat surface, like grass, sand or carpet. NEVER place
the product on a hard surface.
• Remove shoes, socks, eyeglasses, helmets, headgear, loose clothing, hoods,
scarves, sharp objects or any clothing containing drawstrings before playing in
the unit.
• DO NOT allow toys or any objects inside the unit or in the surrounding area,
except for the items included in this package.
• Examine the unit periodically for potentially unsafe conditions such as
abrasions, holes or tears.
• Ensure the play area is free from hazards such as furniture, walls, sharp objects
and other hard surfaces before setting up the unit or playing in it.
• Clean the item with a damp cloth.
• NEVER use item outside during bad weather circumstances or thunderstorms.
• DO NOT continue to use this product if any part is damaged or broken.
• DO NOT leave the unit in any area where it might become damaged.
• This tent is intended for domestic family use only. Not for commercial use or as a
IMPORTANT:
Before set up, please check that you have all parts
necessary for assembly. In addition, we recommend
that you separate all parts to expedite assembly.

HERE TO HELP!
Contact Customer Service:
1 -888-752-TOYZ (8699)
or send us an email at:
help@bettertoyz.com
rental.
• DO NOT use this unit in a manner other than specified in instructions.
• DO NOT attach items such as jump ropes, pet leashes, cables, etc. to product as
they may cause a strangulation hazard.
• DO NOT drag the unit, as it may cause irreparable damage.
• DO NOT allow child to attempt to climb the item as doing so may cause a
tipping hazard.
• Keep pets away from the product.
• DO NOT leave children unattended at any time.
• Allow only one child at a time.
• The repair patch is not a toy. Keep repair patch properly stored and away from
children.
• Please contact our customer service department for assistance with
damaged or broken item.
While every attempt is made to embody the highest degree of protection in all equipment, we cannot guarantee freedom from injury.The user assumes
all risk of injury resulting from use. All merchandise is sold on this condition, which no representative of the company can waive or change.
Before you Begin:
• Only adults must set up this product.
• Remove the product from the packaging. Save
packaging for storage when finished playing.
• Discard all plastic bags and fasteners safely AWAY from
children. Preferrably into trash and out of reach from
children and pets.
• Carefully unfold the product in a flat area which has
been cleared of all objects of any kind.
• DO NOT use on hard floors like concrete or wood floors
• DO NOT set up this product on an uneven surface
which may cause the unit to slide or tip over.
INSTRUCTIONS
IMPORTANT: Before set up, check that you have all parts necessary for assembly.
In addition, we recommend that you separate all parts to expedite assembly.
1. Carefully unfold item in a soft, flat and even surface which has been cleared of all objects.
2. Lift the air valve plug from the inflation/deflation opening on the edge of the unit.
3. Place the hose of pump (hose and pump not included) into the valve opening.
4. Turn the pump ON and inflate the unit.
NOTE: Pump may be purchased at most hardware sporting goods store and other retail outlets.
Some pumps have inflate and deflate valves. Follow pump instructions when attaching hose.
/f\CAUTION – DO NOT allow children to play on or in the unit until it is fully
inflated. Inflate the unit only to the point that it is firm but not hard and wrinkles
are still visible in the area of the welded seams. Do Not over-inflate the unit. Doing
so may cause damage to the unit and bodily injury to the child should the unit fail
from over-inflation. Inflation time will depend upon the type of pump being used.
Once the unit is inflated, remove the hose and close the inflation/deflation opening
by pressing the plug into the opening firmly to assure there will be no air leakage.
• Now repeat for the other remaining plugs.
• Allow only one child at a time to play with the product.
Minimun clearance play zone:
Must have a 2m (6.6 ft.) obstacle free zone around the product.
2m (6.6 ft.)
2 m (6.6 ft.)
2m (6.6 ft.)
2m (6.6 ft.)
2m (6.6 ft.)
A WARNING: do not jump on
PRODUCT.
DO NOT STAND IN FRONT OF OPENING WHERE
BALLS COME OUT WHILE ANOTHER CHILD IS
KNEELING DOWN ON PILLOW.
ALLOW ONLY ONE CHILD AT A TIME TO PLAY WITH UNIT.
HOWTO USE THE DUELING SNOW BLASTERS

WORKS BEST WITH BALLS INCLUDED (D:2.25″) ijr
(fll Kneel down
ont the pillow
from standing
position!
/S\wARNING – Instruct the child how to play with the Dueling Snow Blaster.
REPAIRING A PUNCTURE
In the event the Dueling Snow Blaster is accidentally punctured and adult must
perform the following steps. Keep repair patches away from children.
1. Deflate the item, clean the punctured area with water and allow it to dry.
2. Cut a portion of the patch allowing approximately 1 V2″ of excess patch material
on all sides of the opening to be patched and round the corners
3. Remove the backing of the patch material, position the patch over the damaged
area and smooth out any bubbles with a paper towel.
4. Allow the item to sit for 30 minutes before re-inflating.
Repair Patch: Keep away from children. For Adult use only.
A repair patch has been included with the product to repair small leaks and holes.
DEFLATION & STORAGE
An adult must deflate and store the unit. Here’s how:
1. Remove the child from the unit.
2. Remove the plug from the inflation/deflation opening.
3. Allow the unit to deflate completely.
NOTE: If you have purchased a pump that has both inflating and deflating functions,
make sure the pump is on deflating mode. Then, simply place the end of the hose into
the inflation/deflation opening in the unit, turn on the pump and the unit begin to
deflate. If your pump does NOT have this feature, once the side walls of the unit are
deflated, press gently on the top of the unit to help air escape from the deflation opening.
DO NOT jump or lie on the unit to help deflate it as doing so may damage the unit
and cause bodily injury to the jumper.
Once deflated, fold the unit as it came out of the package for storage. Store indoors in a
dry place away from children’s reach.
DO NOT leave the unit in any area where it might become damaged.
Cleaning Instructions: Surface wash with water only. Do Not use chemicals or abrasives.
Dry thoroughly before storing.
AWARNING:
1. Unit is intended for domestic family use only. Not for use in public areas or as a rental.
2. DO NOT use this unit in a manner other than specified in instructions.
3. Instruct children on proper use of the unit.
4. DO NOT allow attachment of items such as jump ropes, pet leashes, cables, etc., to product as
they may cause a strangulation hazard.
5. DO NOT drag the unit as doing so may cause irreparable damage.
6. DO NOT place the Dueling Snow Blasters on hard surfaces, such as concrete or wood floors.
7. Allow only ONE CHILD at a time to play with the unit.
8. DO NOT allow toys or any other objects inside the unit or in the surrounding area. Beside balls
included with product.
9. Remove shoes, socks, eyeglasses, helmets, headgear, loose clothing, hoods, scarves, sharp
objects or any clothing containing drawstrings before playing in the unit.
10. Examine the unit periodically for potentially unsafe conditions such as abrasions, holes or
tears in the plastic.
11. DO NOT allow child to attempt to climb on the wall as doing so may cause a tipping hazard.
12. Keep pets away from the product.
13. Maximum allowable weight of person using the unit 60 lbs.
14. Check the product during use and re-inflate as appropriate.
15. Ensure the play area is free from hazards such as furniture, walls, sharp
objects and other hard surface before inflating the unit or playing in it.
16. DO NOT leave children unattended at any time.
17. DO NOT use as a flotation device. Near swimming pools, any body of water, or snow.
18. DO NOT use with persons under 3 years of age and over 6 years of age.
19. DO NOT use on or near stairways, hills, driveways and roadways.
20. DO NOT dive on or jump off of item.
21. NOT to be used as a bed as a child may become wedged between the wall and floor and
suffocate.
22. DO NOT use electric air pump if water or moisture is present. This may result in electric shock.
23. NOT FOR ADULT USE.
© 2018 Better Sourcing Worldwide, ltd.
1835 East Hallandale Beach Blvd, Unit 635,
Hallandale Beach, FL 33009
HERETO HELP!
www.littletikes.com
®&© Little Tikes. U.S.
& other countries.
For more information or questions.
Contact Customer Service:
1-888-752-TOYZ (8699)
or send us an email at:
help@bettertoyz.com
PLEASE DO NOT RETURN TO STORE. Made in China. Printed in China
Contents, including specifications and colors,
may vary from photos depicted on package.
Keep content details for future reference.
Used under license by
Better Sourcing Worldwide, Ltd.
Item: 9335

3M™ WorkTunes™ Connect Wireless Hearing Protector Instructions & Manual

Download PDF Manual:

3M WorkTunes Connect Wireless Hearing Protector Instructions & Manual.pdf

Full Text of Manual:

WORKTUNES™
CONNECT WIRELESS HEARING PROTECTOR
featuring Bluetooth® wireless technology
Basic Operations
Charging the Headset:
To comply with regulatory guidelines, your hearing
protector has been shipped to you with only a
partial charge on its integrated lithium ion battery
pack. To charge the hearing protector, insert
the supplied micro-USB connector cable into
the micro-USB jack located on the bottom of the
right cup of the hearing protector. Connect the
other end of the cable to a suitable USB power
source such as a computer or third party certified
(UL, Intertek, etc.) AC to USB wall adapter.
The LED will be blink blue while charging and
change to solid blue when complete.
Fitting the Headset:
Fully extend sliders and place cups over ears.
Then, tighten headband using sliders.
Power and Volume:
Press and hold power button for 3 seconds to
power ON/OFF headset. Voice Assist will
announce “Power ON” or “Power OFF.” Voice
assist will also provide a battery status update –
“Battery High,” “Battery Medium,” “Battery Low,”
or Battery Empty. Adjust the volume using your
connected device.
Low Battery Warning:
Hearing protector will also provide a “Battery Low”
warning every 20 minutes when battery voltage is
low. An additional Battery Empty” warning will
occur as hearing protector powers down.
Recharge the unit at this time.
Auto Shut-Off:
5 minutes after either Bluetooth® or the audio
input is disconnected, the hearing protector will
automatically power down.
After auto shut-off, press and hold the ON/OFF
button for 3 seconds to turn back on.
WORKTUNES™/MC
CONNECT WIRELESS HEARING PROTECTOR
featuring Bluetooth® wireless technology
PROTECTION DE L’OUIE SANS FIL CONNEXION
avec technologie sans fil Bluetooth®
PROTECTOR AUDITIVO INALAMBRICO CON CONEXION
con tecnologia Bluetooth® inalambrica
, ‘W m 008 l |B aiiie|| ‘ei|BJisnv ug *frifrfr-i9Z-008-l |b buib|| ‘epeueo uj -zsfiE-WfrHJOS-1
|B aLUBj| o tuoo-Aia^siAIS’/vtMAA jaujauij ua aijsjA ‘sopmn sopejsg so| ua uopeiujoim seiu ateg ‘sopeAjasaj soijoajap so| sopoi -^g Yioz ©
•Biauaaji ofeq aosq as i/\|£ ap ajjed jod saDjew seqDjp ap osn jainb|Bno A *3U| ’91s qiooianig ap pspaidojd ap SBpBjjsiBaj
sbojbuj uos gqjoojania so6o| so| A BAijBmtuouap bojelu Bg -bpbubq ua Bibuaoji olsq sepBSfi -^g ap saiBjojamoa sbdjbuj uos sauni>(Joyv\ A ^g
VNIH3 N3 0H03H
VAd 60902M/\IIA!i Od’d d’Q ‘O3!X0[/\j ‘uo6ajqo 0JBA|y |0a
OlZlO d’3 ‘?d bjubs ioq
061 3d V1NVS AV A’D 3Q VS ‘0DIX3IAIIAIS
:uod OQinamisiQ
‘WfrKOOOB l a| Jasodiiioo’aiiBJjsne ug ‘trl^-A93-008-L S| Jssoduioo’BpBUBO nv 7S9£-fr6t-008-l
a| jasodujoo no iuoo-Aj0)bsi/\|£’aaaaaa ajis aj jajjnsuoo za||maA ‘siuaiuauGiasuaj sa|dtuB sn|d ap jjuaiqo jnog -saAjasaj sjjojp snoi *^|£ YlOZ ©
■aouaoij snos ajie^jsa
WE Jed sanbjBiu sao ap uoiissiiiin aino;ja -ou\’gjs moojania sp saasodap sanbiBiu sap juos ^qioojanig soBoj sa| ja a|BqjaA anbiBiu sg
‘bpbubq nB aouao!| snos saasupn ‘[A3£ap aojamujoo ap sanbjBiu sap juos saunxgjoMia IAIE
AASS-t?9S-008-L
lit? V9N (OiaViNO) N0QN01 ‘VQVNVO TO : ava ananusia
E-6Z.St/-0Zi8-t>E M-ilOZ :aWa anss|
‘Wt WOODS 111=0’a!|84snv U| ‘nwr-WZ-OOS-l IIBO’Epeuej U|
‘ZSSE-t?6t?-008-l IIaa JO woo’AjafBSWE’MMM jaujaju| aas ‘sajais pajiun ul uopeuuoju! ajoui joj -pa/uasaj sinBu ||v ‘|/\i£ ‘Liaz ©
■asuaa!| japun s| j/\j£ Aq s>|jeui qons qo asn Aua pus au ‘gig qqoojanig Aq paumo s)|jaujapejj pajaqsjOaj aje soBoj pue ))jguj pjom 0qqooian|g aqi
■epeuag u| asoaoji japun pasfl -j/qg po sqjaujapBJi aje saunjppiOM puB [/qo
VNIH3 Nl 3QVIAI
^ lOS9-iSl-lS9 Z9S£-t?6t?-008-l
0001-WIS9 NIAI invd IS H31N33 WE ‘WE
:as asinaiaisia
t1i0eTrenSveconToy|sn0t ^ C°mpatible with this feature and wi” have to be operated using
SAF 5iMATION
priortoThe’us^f?^3^’ a*d f0llr a” Saf6ty information contained in these instructions
futurl reference f h’S 6 ® °n,C hear,ng Proteotion product. Retain these instructions for
Intended Use:
This electronic hearing protection product is intended to help protect against harmful noise
This electronic hearing protection product is used in loud-noise environments. Use in any
other application has not been evaluated by 3M and may lead to an unsafe condition.
Explanation of Signal Word Consequences
A WARNING:
Indicates a hazardous situation which, if not avoided, could result
in serious injury or death.
A CAUTION:
Indicates a hazardous situation which, if not avoided, could result
in minor or moderate injury and/or property damaae.
A WARNING
These hearing protectors help reduce exposure to hazardous noise and other loud sounds
Ure,t0 Wear hearing ^ all times that you are exposed to noise may
result m hearmg loss or injury. For proper use, see user instructions or call 3M Technical
Service toll free at 1-800-494-3552.
* To reduce the r«sks associated with hazardous voltage and fire:
– Never use this product, or charge/replace batteries, in an explosive environment
– Only charge using 3rd party certified (such as UL, Intertek, etc.) equipment.
– Do not disassemble, modify, or service this device. The unit contains no user
serviceable parts.
• To reduce the risks associated with harmful noise:
– Always wear hearing protectors when you are exposed to noise
– Ensure hearing protection is properly fitted. Follow any fitting instructions included
with this product.
~ °° ?°t bend °r reshape the headband, as this will cause a loose fit and sound leakage.
‘ For best Protection, the ear cushions should seal firmly against your head. Anything
that interferes with the seal such as long hair (pull back to the extent possible) thick
or poorly fitting eyeglass temples, pencils or caps will lessen the protection.
WorkTunes™ Connect Wireless Hearing Protector
Bluetooth® Range
The typical range between a Bluetooth® device
and the WorkTunes™ Connect Wireless Hearing
Protector is approximately 25 feet. This distance
may vary depending on the device. As the distance
between the Bluetooth® device and the hearing
protector is increased, the risk of signal dropouts will
also increase. For best results, keep your Bluetooth®
device on your body or within arm’s length of the
WorkTunes™ Connect Wireless Hearing Protector
while using Bluetooth® mode.
Bluetooth9 Technical Details
Transmission power range: -6 dBm to +4 dBm (ERP)
Operating frequency band: 2402 MHz – 2480 MHz
Audio Input Mode
Connect Device:
Connect the device using a compatible 3 or
4-pole 3.5mm stereo audio cable. Turn on the
hearing protector.
Control device:
Use the native controls on the device to control
input volume, pause/play, and select tracks.
Quicks! .ide
Phone Cal
MODE
Answer Call
Press once
Reject Call
Press and hold
Disconnect Call
Press once
Audio Input
MODE
All Functions
Use device controls
Pairing the Device:
Once powered on, double press the button on the
hearing protector’s right cup to enter pairing mode.
You will hear “Bluetooth Pairing ON.” Make sure your
Bluetooth® enabled device is scanning/searching
for devices. Check your device to make sure it has
discovered “WorkTunes Connect.” Select “WorkTunes
Connect” to connect to the hearing protector. Once
connected successfully, you will hear “Bluetooth
Connected” and the LED on the right cup will turn blue.
Your Bluetooth® audio volume will be controlled by
your device.
The next time you power up, your hearing protector
will automatically connect to your device and say
“Bluetooth Connected.”
Forward/Back or Pause/Play*
To pause or play audio on your device, you can single
press the button on the right cup. To advance tracks,
double press the button. Triple press to select the
previous track.
*Some devices may not be compatible with this
feature and will have to be operated using their
native controls.
Incoming Calls
In Bluetooth® Mode, incoming phone calls will
cause the music to be muted and you will hear your
phone’s ringtone until the call has ended. To answer
an incoming call, press the button on the hearing
protector once. To disconnect from a call, press the
button once more. After disconnecting from the call
you will hear “Call Terminated.”
To reject a call and return to Bluetooth® audio, press
and hold the button. After rejecting a call you will
hear “Call Terminated.”
ATTENUATION DATA (ANSI S3.19-1974)
Test Frequency (Hz) 125 250 500 1000 2000 3150 4000 6300 8000 NRR CSA
Class
Mean Attenuation (dB) 18.6 21.0 28.5 32.4 35.1 39.1 41.4 41.7 41.1
24 A
Standard Deviation 3.2 2.3 2.6 3.2 2.6 3.3 3.1 3.1 3.3
The level of noise entering a person’s ear when a hearing protector is worn as directed is closely
approximated by the difference between the A-weighted environmental noise level and the NRR.
EXAMPLE
1. The environmental noise level as measured at the ear is 92 decibels dB(A).
2. The NRR is 24 dB(A).
3. The level of noise entering the ear is approximately 68 dB(A).
CAUTION
For noise environments dominated by frequencies below 500 Hz, the C-weighted environmental
noise level should be used. The NRR used in the above example was achieved under
laboratory conditions.
AS/NZS 1270:2002
Test Frequency (Hz) 125 250 500 1000 2000 4000 8000
Mean Attenuation (dB) 21.6 27 37.4 42 38.6 41.2 41
Standard Deviation 3.5 3 3.1 3.8 2.6 2.2 3.8
SLCao 36 dB Class 5 Clamping Force: 9.8 N Mass: 353 g
AUDIO INPUT LEVEL
The audio level in the hearing protector is dependent on the audio input level. To prevent
harmful noise levels, the hearing protector audio level is limited to 82 dB(A) when connected
to a Personal Music Player (PMP). If the hearing protector is connected to a PMP or other
device with a very high output level, it is the user’s responsibility to set the audio input level
to a safe level. The maximum permitted audio input level for 8 hours of usage time, compressed
speech and music is 2.12 V.
WARRANTY
The WorkTunes™ Connect Wireless Hearing Protector is warranted to be free of defects in
material and workmanship for a period of one (1) year from the date of original purchase.
3M will, at its option, repair or replace without charge, except for transportation costs, parts
that fail under normal use and service when operated and maintained in accordance with our
instructions. This warranty does not cover damage caused by misuse, abuse or unauthorized
modifications. Proof of purchase is required to verify eligibility.
Earmuffs must be regularly inspected for cracks, worn parts, and for proper fitting.
Replace as needed.
– Do not immerse in water. Clean with a damp cloth and mild soap. Do not use harsh or
abrasive chemicals.
– Do not store the hearing protector in direct sunlight or at temperature above
131°F (55°C).
– (Devices with Safe Volume Technology) Do not change between ‘Safe Volume Control’
and ‘Limiter’ settings during a single workday.
The WEEE logo (shown at the left) appears on the product to indicate that this
product must not be disposed of or dumped with your other household wastes.
You are liable to dispose of all your electronic or electrical waste equipment by
relocating over to the specified collection point for recycling of such hazardous
waste. Dispose of components in accordance with all applicable local and
governmental regulations.
FCC WARNING:
Any Changes or modifications not expressly approved by the party responsible for compliance
could void the user’s authority to operate the equipment.
This device complies with part 15 of the FCC Rules. Operation is subject to the following
two conditions: (1) This device may not cause harmful interference, and (2) this device must
accept any interference received, including interference that may cause undesired operation.
Note: This equipment has been tested and found to comply with the limits for a Class B
digital device, pursuant to part 15 of the FCC Rules. These limits are designed to provide
reasonable protection against harmful interference in a residential installation. This equipment
generates, uses and can radiate radio frequency energy and, if not installed and used in
accordance with the instructions, may cause harmful interference to radio communications.
However, there is no guarantee that interference will not occur in a particular installation. If
this equipment does cause harmful interference to radio or television reception, which can
be determined by turning the equipment off and on, the user is encouraged to try to correct
the interference by one or more of the following measures:
– Reorient or relocate the receiving antenna.
– Increase the separation between the equipment and receiver.
– Connect the equipment into an outlet on a circuit different from that to which the
receiver is connected.
– Consult the dealer or an experienced radio/TV technician for help.
This equipment complies with FCC RF radiation exposure limits set forth for an uncontrolled
environment. This transmitter must not be co-located or operating in conjunction with any
other antenna or transmitter.
ISEDC WARNING:
This device complies with Innovation, Science, and Economic Development Canada
license-exempt RSS standard(s). Operation is subject to the following two conditions:
1. this device may not cause interference, and
2. this device must accept any interference, including interference that may cause undesired
operation of the device.
Radio apparatus containing digital circuitry which can function separately from the
operation of a transmitter or an associated transmitter, shall comply with ICES-003. In
such cases, the labelling requirements of the applicable RSS apply, rather than the labelling
requirements in ICES-003.
Warning:
This Class B digital apparatus complies with Canadian ICES-003.
The device has been tested and compliance with SAR limits, users can obtain Canadian
information on RF exposure and compliance.
NOISE REDUCTION RATING (NRR)
The Environmental Protection Agency (ERA) has selected the Noise Reduction Rating (NRR)
as the measure of a hearing protector’s noise-reducing capabilities. 3M makes no warranties
as to the suitability of the NRR as a measure of actual protection from any noise level
since such protection depends on the sound level (loudness), how long you listen to the loud
sound and how well you fit the earmuff over your ears. Although hearing protectors can be
recommended for protection against harmful effects of impulse noise, the NRR is based on
the attenuation of continuous noise and may not be an accurate indicator of the protection
attainable against impulse noise such as gunfire.
When worn according to the User Instructions, this hearing protector helps reduce exposure
to both continuous noises, such as industrial noises and noises from vehicles and aircraft, as
well as very loud impulse noises, such as gunfire. It is difficult to predict the required and/or
actual hearing protection obtained during exposure to impulse noises. For gunfire, the weapon
type, number of rounds fired, proper selection, fit and use of hearing protection, proper
care of hearing protection, and other variables will impact performance. If your hearing
seems dulled or you hear a ringing or buzzing during or after any noise exposure (including
gunfire), or for any other reason you suspect a hearing problem, your hearing may be at risk.
To learn more about hearing protection for impulse noise, visit www.SMcom/hearing.
The NRR may overestimate the hearing protection
provided during typical use due to variation in fit,
fitting skill and motivation of the user. 3M recommends
the NRR be reduced by 50% or in accordance
with applicable regulations, for estimating
the amount of noise reduction provided.
The NRR for the WorkTunes™ Connect Wireless
Hearing Protector is 24 dB(A). Improper fit of this
device will reduce its effectiveness in attenuating
noise. Consult the enclosed instructions for proper fit,
Noise
Reduction 24 1 Rating (WHEN USED AS
DIRECTED)
THE RANGE OF NOISE REDUCTION RATINGS
FOR EXISTING HEARING PROTECTORS
IS APPROXIMATELY 0 TO 30
(HIGHER NUMBERS DENOTE GREATER EFFECTIVENESS)
3M COMPANY
ST. PAUL, MN
Worktunes™ 90543
Federal law prohibits ^
removal of this label
^prior to purchase
■m m a LABEL REQUIRED BY
F” M’H U.S. EPA REGULATION
isai f“4 40 CFR PART 211
SUBPARTB J
The EPA references to Federal relate to US Federal laws.

Cute Friends Smart Puppy Instructions & User Manual

Download PDF Manual:

Cute Friends Smart Puppy Instructions & User Manual.pdf

Full Text of Manual:

CUT€ FRI6NDS
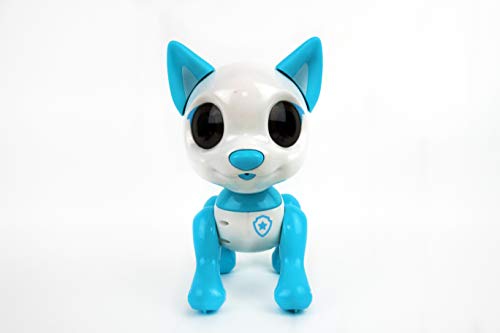
SMART PUPPY *^4
How to play
NOSE BUTTON
PRESS to hear SOUNDS or to
STOP THE ACTION or let me walk
or RESUME me from hibernation.
LIGHT UP EYES
SOUND CONTROL
Clap your hands near my mouth 1
time to let me walk,clap 2 times to
walk,sit down or stand up.
JAW SENSOR
PET MY JAW I will sit down and my
eyes turn red waiting for your
feeding.Keep petting my jaw 3 times I
will be full and stand up to dance.
Otherwise I will not do anything but
waiting for your pet._______________
HEAD SENSOR
I can BARK or WALK when you
are PETTING me.
ON/OFF SWITCH
OFF R bON
NOTE:
Turn off when not in use.
mi \
V Qi KNOCK AT MY BODY
KNOCK AT anywhere of my body 1
time to let me walk,2 times to sit
down or stand up.
Battery Installation-arid Charging P
Battery installation (Apply to AAA size battery version)
1.Switch off the puppy.
2.0pen the battery compartment by loosening the screw.(fig.l)
3. Put 3 x AAA battery(not included) in the battery compartment
as per the polarity shown inside.(fig.2)
4. Place back the battery compartment cover.(fig.3)
TIPS!
Best performance can be only obtained by using
new alkaline batteries.
Battery installation (Apply to 3.7v Li-ion battery version)
1 .Switch off the puppy.
2.0pen the battery compartment by loosening the screw.(fig.4)
3.Insert the Li-ion battery(included) plug into the socket,and put
the Li-ion battery in the battery compartment as per the
polarity shown inside.(fig.5)
4,Place back the battery compartment cover.(fig.6)
Charging the battery
1 .Switch off the puppy. Open the battery compartment by loosening the screw(fig.4). Unplug the battery plug(fig.7). Insert the battery plug into the charging
socket on the USB(fig.8). Insert the USB plug into the USB socket,the charging indicator turns on,the charging process begins(fig.9).
2.Unplug the charging plug after the charging indicator turns off.Charging is completed.
________ UPS!_______
1. The puppy can operate for about
one hour per every one hour
charging.
2. Before recharging the battery, wait
10-15 minutes for it to cool down.
For age 3+
AAA size battery version 3.7v Li-ion battery version
-The puppy -The puppy -3.7v Li-ion battery
-Instruction manual -Instruction manual -USB charger wire
Safety Precautions
-Parents,this toy is recommended for children. To ensure that your child’s play is both safe and fun, please review the operating
instructions with your children.
-DO NOT pick up moving puppy.
-Keep hands,hair and loose clothing away from the legs when power switch is turned ON.
-Remove battery from the toy when not in use.
Warning :Changes or modifications to this unit not expressly approved by the party responsible for compliance could void the user’s
authority to operate the equipment.
The crossed-out dustbin symbol indicates that batteries,rechargeable
batteries,button cells,battery packs.etc.mush not be put in the
household waste. Batteries are harmful to health and the environment.
Please help to protect the environment from health risks. Tell your
children to dispose of batteries properly by taking them to the local
collecting points. This way batteries are recycled safely.
Waste Electrical and Electronic Equipment(WEEE)
When this appliance is out of use,please remove all batteries
and dispose of them separately. Bring electrical appliances to the
local collecting points for waste electrical and electronic
equipment. Other components can be disposed of in domestic
refuse.
Cautions:
-Non-rechargeable batteries are not to be recharged.
-Rechargeable batteries are to be removed from the toy before being charged.
-Rechargeable battery are only to be barged by an adult.
-Different types of batteries or new and used batteries are not to be mixed.(Transmitter only)
-Only batteries of the same or equivalent type as recommended are to be used.
-Batteries are to be inserted with correct polarity.
-Exhausted batteries are to be removed from the toy.
-The supply terminals are not to be short-circuited.
-Do not mix old and new batteries.(Transmitter only)
-Do not mix alkaline,standard(carbon-zinc)or rechargeable (nickel-cadmium) batteries.(Transmitter only)
Care and Maintenance:
-Always remove batteries from the toy when it is not being used for a loiig period of time.
-Wipe the toy gently with a clean damp cloth.
-This toy is intended for indoor use only.
-Do not submerge the toy into water that can damage the electronic assemblies.
Note:
-Parental guidance is recommended when installing or replacing batteries.
-Users should keep and retain this information for future reference.
-Users should keep strict accordance with the instruction manual while operation the toy.
Battery requirement for AAA size version: Battery requirement for 3.7v Li-ion battery version:
Empower Supply: Power Supply: =r-
EE Rating :DC6V,1.35W Battery ratings: DC3.7V
IQ ©E Batteries : 3 x 1.5V “AAA7LR03/AM4(not included) Batteries : 1 x 3.7V Li-ion Rechargeable Battery Pach(included)
Capacity : 300 mAh
TIPS!
Best performance can be only
obtained by using new alkaline
batteries.

Pomsies Instruction & User Manual

Download PDF Manual:

Pomsies Instruction & User Manual.pdf

Full Text of Manual:

© in Pet
th them
Freeze Dance Mode
Press and hold the nose for 1 second to switch
to Dance Mode (purple eyes). When the whistle
blows, shake Pomsies to the beat of the music.
The faster you shake, the faster the music plays.
When you hear another whistle, freeze! Hold the
nose for another second to return to Pet Mode.
Press and hold the nose
for 3 seconds to make
Pomsies fall asleep.
Teal Happy
Pomsies love to be petted. Try petting
their back to make them purr. Interact
with Pomsies in other ways by
touching their head and mouth,
tapping their nose or by shaking
them. Pomsies will reward your
affection with rainbows!
SECRET TOOT: Press and hold their
mouth and back at the same time for
1 second and they might just let out
a TOOT! Oops!
Yellow Hungry
Feed them by pressing on their
mouth area. Feed them too much
and they might get the hiccups!
Green Hiccups
Uh oh! Pomsies have the hiccups.
Shake them up to make the hiccups
go away.
Blue
Sneezy,
Coughing or
Shivering
Oh no! Pomsies are not feeling too
well. If they are sneezing, shivering
or coughing, help nurture them back
to health (teal).
Sneezing: Tap their nose to make
them feel better!
Coughing: Cover their mouth to
avoid spreading germs!
Shivering: They are cold! Hug them
and touch their back to warm them
up!
Pink Silly
Pomsies are feeling a little silly and
giggly. Hehehe… keep tickling them
to get all the sillies out!
Rainbow
V_____
SUPER
HAPPY!
As you care for Pomsies, their eyes
will glow Rainbow! After 5 rainbows,
they will surprise you with a happy
song. Shake them to the beat of the
music or speed up their jingle by
shaking faster. ^
CONTENTS: 1 Pomsies™ Pet, 1 Brush, and 1 Instruction Sheet
NOTE: Remove “Try Me” puli tab before use. Product Care
Battery Info
– Have an adult install fresh batteries. Pomsies require
1 AAA Alkaline (LR03) 1,5V battery.
– To change / insert battery, flip Pomsies pet upside down,
open felt pouch and turn screw to the left to unfasten
battery door.
Impoilant Br-tnery Info:
– Suggest use of only fresh alkaline batteries of the
required size and recommended type.
– Do not use rechargeable batteries.
– Please respect the correct polarity, (+) and (-).
– Do not attempt to recharge non-rechargeable batteries.
– Do not dispose of batteries into fire.
– The supply terminals are not to be short-circuited.
– Remove exhausted battery from the toy.
– Battery should be replaced by adults.
– Battery should be recycled or disposed of as per
state and local guidelines.
– Remove battery when storing toy.
T roubleshootin«)
Replacing Pomsies with fresh battery will resolve most troubleshooting
issues. If problems continue, please reach
out to our customer service department:
customerservice@skyrocketon.com
– Do not immerse Pomsies in water or any other form
of liquid.
– Do not throw or kick Pomsies as this may damage
mechanical functionality.
– Do not leave Pomsies in extreme heat or freezing
temperatures, as this can result in permanent
mechanical damage.
– Surface wipe clean with a damp cloth and keep moisture
away from battery compartment.
FCC Statement
This device complies with PART 15 of the FCC Rules.
Operation is subject to the following two conditions. (1)
This device may not cause harmful interference, and (2) this
device must accept any interference received, including
interference that may cause undesired operation.
CAUTION: Changes or modifications to this unit not
expressly approved by the party responsible for compliance
could void the user’s authority to operate the equipment.
NOTE: This equipment has been tested and found to
comply with the limits for a Cl_ass B digital device, pursuant
to Part 15 of the FCC Rules. These limits are designed to
provide reasonable protection against harmful interference
in a residential installation. I his equipment generates, uses
and can radiate radio frequency energy and, if not installed
and used in accordance with the instructions, may cause
harmful interference to radio communications. However,
there is no guarantee that interference will not occur in a
particular installation. If this equipment does cause harmful
interference to radio or television reception, which can be
determined by turning the equipment off and on, the user is
encouraged to try to correct the interference by one or
more of the following measures: Reorient or relocate the
receiving antenna – Increase the separation between the
equipment and receiver – Connect the equipment into an
outlet on a circuit different from that to which the receiver is
connected – Consult the dealer or an experienced radio/TV
technician
for help.
HQ7 This device is marked with the selective sorting symbol on waste electrical and
jXJ electronic equipment. This means that this product should be supported by a
selective collection system accordance with applicable regulations in order to be
1 either recycled or dismantled in order to reduce any impact on the environment.
1 he batteries, submitted to a specific collection system, must be removed from the product
and disposed of separately. When that the batteries are not to be extracted, the product
must be delivered to and appropriate collection center for recycling is complete. Electrical
and electronic products as well as batteries that have not been sorted before disposal are
potentially dangerous for the environment and human health due to the presence of
hazardous substances. For more information, contact your local or regional government.
© 2018 Skyrocket LLC, Los Angeles, CA 90066 USA. All rights reserved.
Pomsies and Skyrocket and their respective logos are trademarks and/or
registered trademarks of Skyrocket LLC. All other trademarks, logos and
copyrights are the property of their respective owners, and there is no
relationship express or implied with Skyrocket LLC.
Questions or comments?
Please call 888-674-5650 or visit www.Pomsies.com
Product colors and styles may vary from those shown. Retain this package
for future reference.
MADE IN CHINA

Hatchimals User Manual

Download PDF Manual:

Hatchimals User Manual.pdf

Full Text of Manual:

A WARNING:
CHOKING HAZARD-Small Parts.

1. HOLD
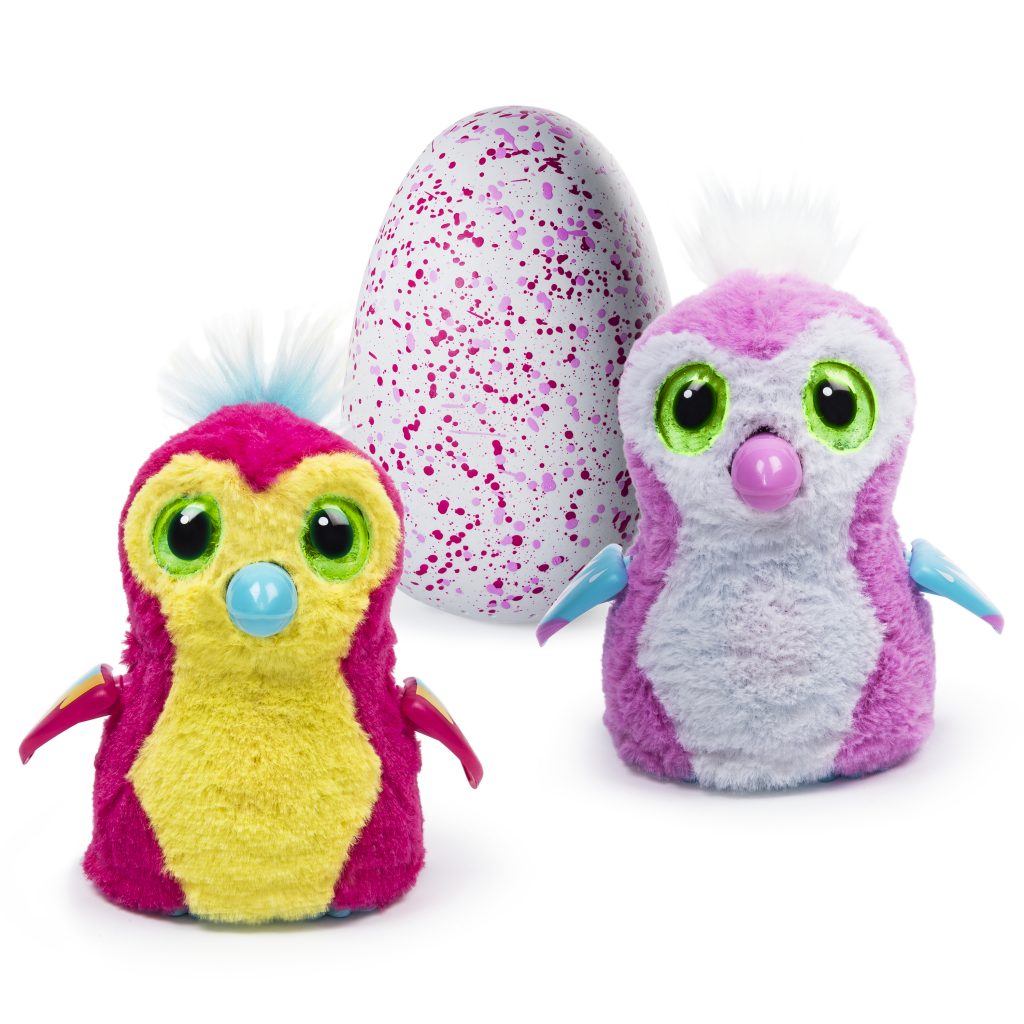
Hold the egg in your hands. Rub the
heart. When it changes from purple to
pink, it’s ready to hatch!
TIP – The speckles on the egg tell you
which family it’s from.
2. HATCH
Gently press right above the heart with
your thumb to crack. Continue pushing
until the egg top can be removed.
3. PLAY
Take your Hatchimal CollEGGtible out
of the egg. Remove the remaining
eggshell pieces above the perforated
line. Dispose of them and the clear
plastic inside.
TIP: The bottom of the egg can be
used as a nest!

DO NOT SWALLOW OR PUT THE EGG IN MOUTH!
NE PAS AVALER OU METTRE L’CEUF DANS LA BOUCHE!
Hatchimals™. Patent Pending, / Brevet en instance.
TM&© Spin Master Ltd. All rights reserved /Teas droits reserves.
SPIN MASTER LTD. 450 FRONT STREET WEST, MADE |N VIETNAM
ALSAR’L HECHOEN VIETNAM
20 RUE DES PEUPLIERS, L-2328, LUXEMBOURG
CUSTOMER SERVICE/SERVICE CLIENTELE: 1-800-622-8339
EMAIL: customercare@spinmaster.com
A Warning: CHOKING HAZARD-Small parts.

Telly the Teaching Time Clock

Download PDF Manual:

Telly the Teaching Time Clock.pdf


Full Text of Manual:

This product conforms to safety requirements of ASTM and EN71,

the learning
JOURNEY

SUITABLE FOR CHILDREN AGED 3 YEARS AND
Move my hands and
I’ll tell you the time!
Real Working
Clock
Analog and
Digital Display
Turn Knob
Speaker
2 Play Modes:
•Tell Time
•Quiz Game
On/Off/Volume
Button
Night-Light
Handle
Activity Modes:
Activity 1 – Tell Time
This activity allows your child to learn how to tell time through discovery and exploration.
• Turn the clock hands to any time, and Telly the Teaching Time Clock will announce the selected time.
The minute hand can be moved in 5 minute intervals.
Activity 2 – Quiz Game
This activity asks your child to identify a specific time on the clock by moving the hands to the time selected.
• When this activity is selected, the unit will ask a random set of questions.
• To select the correct answer, turn the clock hands to the correct time. The unit will confirm whether or not the answer is correct.
• If the answer is correct, a positive statement will be made and a new question will be asked.
• If the question is answered incorrectly three times in a row, a new question will be asked automatically.
Diagram:
1.2.
3.
On/Off/Volume Button – Use switch to turn the unit on and off and to adjust the volume (high or low|.
Play Mode Selector – Move the switch to select one of the two activities.
Digital Display – When the unit is off, and the time is set, this display shows the time.
When in an activity mode, this display shows the time being taught.
Movable Clock Hands – Move the clock hands to activate the time-telling function.
Turning Knob – Use this knob to rotate the clock hands more freely. (D
Turn slowly to avoid damaging internal components.
Night-Light – Push down on the light to turn it on for nighttime comfort. Push down again to turn off.
Night-light will turn off in three minutes.
Carry Handle (on back of unitl – Use this handle to make Telly the Teaching Time Clock more portable.
Battery Compartment (on back of unitl – Located on the back of the unit.
Set Hour Button – Use this button to set the hour.
Set Minute Button – Use this button to set the minute.
To set time:
Use hour and minute buttons to set time. Press and hold the hour or minute button until display flashes.
Then push the buttons down until correct time is displayed. Time is set when the display stops flashing.
Special notes:
• If Telly the Teaching Time Clock suddenly stops working, or the voice becomes faint or the sound seems weak,
the problem may be low battery power. If this is the case, install a new set of batteries before using.
• Turn hands slowly to avoid damaging internal components.

Little Tikes Hopper Instructions

Download PDF Manual:

Little Tikes Hopper Instructions.pdf

Full Text of Manual:

Item # Item Mo: 9301
Item Mo: 9302
tern Mo: 9304
Parts Included:
lx Hopper, lx Stopper
A WARNING:
CHOKING HAZARD-Small parts.
Not for children under 3 years,
CAUTION: Adult supervision
required at all times.
Minimum weight 32lbs. (14kgs)
Maximum weight of Child
Not to Exceed 641 bs. (29kgs)
vJOo Not Over Inflate.________j
ALWAYS KEEP
BOTH HANDS. ON
THE HANDLE.
MOUNT HOPPER
AS SHOWN
ENSUREYOU
BOUNCE UP 6
DOWN
FOR SAFE PLAY:
1. ADULTS: Stand next to your child as they mount
hopper with both feet flat on ground. Make sure
child adjusts themselves until they are seated
comfortably so they don’t lose balance.
2. Hold firmly with both hands and look forward.
3. Gradually start out with small hopping forward
movements to ensure balance and confidence.
A\. IMPORTANT HOPPER SAFETY & SETUP INSTRUCTIONS:
THE MANUFACTURER AND ITS DISTRIBUTORS ASSUME NO LIABILITY OR RESPONSIBILITY FOR ACCIDENTS OR INJURYTO PERSONS OR PROPERTYTHAT MIGHT RESULT IN CONNECTION WITH THE
USE OF THIS TOY. PLEASE READ AND SAVE THESE INSTRUCTIONS BEFORE SETUP AND USE. KEEP THESE INSTRUCTIONS IN A SAFE PLACE FOR FUTURE REFERENCE. ADULT SETUP IS REQUIRED.
y
©
USE AND CARE INSTRUCTIONS:
IMPORTANT:
This hopper is manufactured to the
highest standard. Every ball has
been inflated and tested before
packing.
Keep away from sharp objects that
could cause damage.
Keep away from heated surfaces.
Use on clean, smooth surface
Inflate ball at room temperature.To
prevent premature material fatigue,
refrain from exposing the product
to sunlight unnecessarily.Over sun
exposure may cause leakage. Wash
with soft, damp cloth. Do not use
soap or any cleaning chemicals.
WARNING!
To avoid the risk of serious injury or death:
• Adult supervision required.
• Adult assembly required.
• This product is intended to be used as a toy
and not as a personal flotation device.
• Do not use a high-pressure pump to inflate.
• Do not over-inflate.
• Do not use electric air pump if water or
moisture is present. This may result in
electric shock.
• Read all instructions before using this
product.
• Disregard of and not following the
instructions, from the manual and warnings
could result in injury or death, especially for
children.
• Use product only on a grassy, level surface,
clear of any obstructions, hard objects of
debris. Failure to do so may result in cuts,
bruises, or other injuries.
Colors and decorations may vary.
ATTENTION IPLEASE DO NOT RETURN T
CONTACT US DIRECTLY FOR A REPLACEMENT
For more information or questions,
Please call customer service…………………..1-888-752-Toyz (8699)
Send us an email at………………………………… heIp@bettertoyz.com
Write to US at: 2015 BETTER SOURCING WORLDWIDE, LTD. 6067
HOLLYWOOD BLVD., SUITE #355, HOLLYWOOD, FL 33024
TO INFLATE (Pump not included):
A. insert pump nozzle into the hole on the boil. A adopter my be
needed (Adapter not included) which comes with most air pumps.
B. Pump until inflated to a maximum of 18″ diameter.
C. When fully inflated, remove the pump adapter and push the stopper
into the hole quickly and firmly, the hopper is then ready to use.
TO DEFLATE: Remove the stopper from the hole.
Press ball flat and fold for storage.
Minimum WeigW of Child 32lbs (14kgs)
MaKimum Weigh! @f Chid i€Sbs (29kg$)
DUKiWG USE:
1. DO NOT LET ANYONE UNDER THE AGE Of 4 USE THIS PRODUCT.
2. Competent adult supervision is required at all times. Responsible
adults should instruct children on proper use of this toy.
3. Remove all hard or sharp objects such as toys, buckles, keys, jewelry
watches, etc. from person and pockets.
A CAUTION: DO NOT ©VEi INFLATE.
Before each use, check the area and clothing for sharp objects to
prevent puncture. Always keep a distance of 10 ft. or more from
others while playing. When playing with this product, stay away
from stairs, pools and roadways. Adult supervision required when
playing with
this product, if using an electric pump, make sure water is not
present.
www.littlettkes.com
© The Little Tikes Company, an MGA Entertainment company.
LITTLE TIKES® is a trademark of Little Tikes in the U.S.
and other countries. All logos, names, characters, likenesses,
r mages, slogans, and packaging appearance are the property
l®1111 of Little Tikes. TTh'””‘ Used under license by Better Sourcing Worldwide, LTD.
betteK^^- ) 2015 Better Sourcing Worldwide, Ltd. Made in China

Top Race Clip Remote Control Object Launcher, Release and Drop Drone Delivery

Download PDF Manual:

Top Race Clip Remote Control Object Launcher, Release and Drop Drone Delivery.pdf

Full Text of Manual:

If you have any questions about this product or its warranty, please contact us at
sales@toprace.com
or give us a call at 212-920-7190
www.toprace.com
1. INTRODUCTION:
Thank you for choosing the Top Race®TR-66 Drone Clip™. The Drone Clip™can be
attached to any larger sized drone capable of lifting at least 3 ounces or more. Please
read this instruction manual carefully before using your device. Save these instructions
for future reference.
IMPORTANT NOTES
The TR-66 Drone Clip™ should not be used as a toy. While it is small in size, it can still
pose dangers to users and anyone in the vicinity. Always follow safety precautions while
using your Drone Clip™.
The TR-66 Manufacturer or dealers assume no liability for damages caused by parts,
wear, improper use, or use in an unsafe manner. Always operate the Drone Clip™in a
safe manner and safe environment, free of obstacles, and at a safe distance from others.
Damage or dissatisfaction, due to accidents or modifications of the product, are not
covered by the manufacturers warranty and will void all attempts to return or replace this
product.
For more information visit www.toprace.com or
email us at sales@toprace.com
WARNING!!!
Users should operate the Drone Clip™ in safe areas away from other people. Never drop
anything from the clip near or above people or pets.
Never drop anything metal, sharp, or too heavy at any time.
Users of this Drone Clip™ are responsible for any errors, poor performance,
and any damage or injury that may occur while using this device.
2. DRONE CUP AND ACCESORIES
$ 41 \* * 26 * *7 9
xi XI X1 X1 X1 X4
3. BATTERY INSTALLATION
Once the battery is fully charged simply connect and install the battery into the clip by removing
the Drone Clip cover and putting it into place.
Note: Use caution when plugging the battery into the Drone Clip™. Do not force the connection
and be sure to connect it the proper way.
Note: Only use the original Top Race charging cable that came in the box.
5. DRONE CLIP INSTALLATION
1. Use the included fastener strip and slide it into the Drone Clip™. (see image)
2. Pull both ends of the fastener strip all the way around the drone until they meet on top
and fasten it together as tight as possible, (see image)
Note: the fastener included is long enough to go around any large size drone. You can
always cut off a piece if its too long to better fit the drone.
Remove the battery cover in back of the
remote and install 3 button batteries in the
transmitter (included), make sure to install
them in the proper polarity as shown inside
the battery compartment. Never mix old
and new batteries.
The TR-66 came with a dedicated USB charging cable
1. Connect the USB Charging cable to a computer or USB outlet.
Once connected the the light on the USB will turn red.
2. Connect the other end of the USB to the Clip battery.
When connected the light will turn off.
3. Once the light turns on again the charging process is complete.
Charge time is about 20 min.
6. PAIRING THE CONTROLLER TO THE DEVICE
1. Turn on the switch of the transmitter.
The light on the transmitter will flicker.
2. Turn on the switch of the Drone Clip.
The lights will stop flickering and the controller will automatically pair up with the Drone
Clip™ and is now ready to use.
7. OPERATING THE DRONE CLIP
Press the button of the transmitter and the Drone Clip™ will open. You can now load your
desired product into the clip. Press the button again and the clip will close, holding the
product, loaded tightly in place and ready to take off.
We have included several accessories to start you off: Water Balloons, Parachute. You
can use the clip for any other product as long it fits and is not too heavy. (Please read
warning)
Note: A special lightweight plastic clip is included in the box to help you clip on products
that wont fit directly to the Drone Clip™.
1 2


MightyMind

Download PDF Manual:

MightyMind.pdf

Full Text of Manual:

IT’S MORE THAN JUST A TOY.
MAKES KIDS SMARTER!
‘°terZ
“m
HUPS IBM BUST FOR HOURS!
ML
MAKES KIDS THINK!
MightyMind®is one of the top five essential toys.
At first glance, it looks like just a box of shapes and puzzle cards, but don’t be fooled.
IU.S.AI
Every child in the world has
to learn how to build and
solve puzzles, because it’s
the first step to building
essential thinking skills.
MightyMind is more than a toy.
It’s a scientifically developed
program that was created way
back in 1978, based on the
research and work of the
Harvard behaviorist B.F. Skinner.
It’s an intricate linear program
comprised of 30 steps
(puzzles), that are precisely
arranged in a numerical
sequence that’s disguised as a
captivating play activity.
It starts off simple enough for a
3 year old and within just 30
connected steps, a child develops
“MightyMind is the only
toy activity in the entire
world that actually teaches
kids how to build
and solve puzzles.”
enough skills to solve puzzles
that many adults would have to
ponder.
For a detailed explanation of how
MightyMind works, please go to
www.mightymind.com
WATCH THE VIDEO
Kids get glued to it,
because it generates a
feeling of success and it
builds a child’s confidence
and self-esteem.
© 2015 Leisure Learning Products, Inc. • 652 Glenbrook Rd.-Bldg. 8, P.O.B. 2697 • Stamford, CT 06906 • (203) 325-2800 • staff@mightymind.com
WHAT MAKES A TOY
ESSENTIAL? 1. It must be entertaining
so a child will continuously
play with it.
2. It must be gratifying
and build a child’s confidence
and self-esteem.
Essential toys feel good. They
inspire children and build
confidence. Simple crayons
and a coloring book allow kids
to demonstrate their ability and
creativity. Four happy words:
“Look what I made!” confirm
confidence and self-esteem.
The basic concept that makes
MightyMind® a unique confidence
building play activity is it’s chain
linked connected puzzle structure.
It follows the concept of linear
programming that was developed
by the Harvard behaviorist
B.F. Skinner. Recognizing that
every child has individual
differences, MightyMind adjusts
to each child by presenting a
series of challenges
through play that build a
child’s critical analytical
thinking skills.
A toy that doesn’t captivate, stimulate
and entertain is basically a
waste of money. Some of the
simplest toys like an inexpensive
rubber ball provide hours of valuable
fun and enormous benefits.
We have applied the
concept of “a little
challenge and a big
reward” to develop
toys that captivate a
child’s imagination.
^ o °
3. It must benefit a child
every time the child
plays with it.
In a world that’s changing rapidly
every minute, kids need to
develop their creative thinking
skills at a very early age.
Toys that foster awareness,
enhance motor skills and coordination,
encourage social interaction
and stimulate a child to think
and be creative have become
necessities.
In 26 countries around the world,
children are benefiting every
time they play with MightyMind.
Since 1978, MightyMind toy
activities have won numerous
awards and have been cited by
leading parenting and professional
media. There isn’t a child
in the world that doesn’t need
the skills that MightyMind
develops.
© 2014 Leisure Learning Products, Inc. • 652 Glenbrook Rd.-Bldg. 8, P.O.B. 2697 • Stamford, CT 06906 • (203) 325-2800 • staff@mightymind.com
KEEPS KIDS BUST FOR HOURS
•o
~ (/)
° w —
^ — C -5 —
§ ?ac «d|c
2 ■= a. re > S ©
O S ‘l O 2 -o ‘5
« E ^ ® o £ ©
•s o -5 ^ ‘5 © ^ o 2 > © £ S
0)
©
©
—^ —“—^
<b) fi
z ,-rb
b
&
c ^ CO
IS
S’.■&
^ > S o
CO 03
cx) = jo
r^n ^co cp:
<cDo -5p — CD -2 !c
< O °
gi §
5 |!:
S w ® ; C 2 .m ■
-Q “ :
fPt £ !8S
> ^ ■
0)
co :5
o c t3 ^ c ■p W 5
CO
X CD
e?J
I— O
0 w
£ o
O CD
CD
CD C C 0
d> c W £ ■— — CCD P W ^
0
O • c 0
0 0
D O c0r fo’
> ~ >
i c o ■ h0 —^ > £ P : D-
■> -^o ^-^r
S’
u
Ul
SI
C0O v+O~
o -o 10 8 W c
c
D •—
O 0
O -Q
c o

£
CD
“00 P
1^ CO ^
CD 0
»_ “D
Q. 0
0 ® £ >-04
0 c 2
0 0^ S ct2
o S .
0 (u ©
-O > -5 w” “ ^ 0
£ MS’S
O Q. Q®. 6
CD
OOO
0P 0 0 >^N
c^ JOC
0Q
Ic/i
-C-C
O 0
i_ CL
o =
0
o E
2 CO
C5
E
CD
£0
O
‘S2 a.
CD
w
_ _________
Dr. Stevanne Auerbach
“MightyMind
products fulfill a
basic developmental
need by
helping u child
develop the
critical analytical
thinking skills
that every child
must acquire for
success.”
About Dr. Auerbach
Dr. Stevanne Auerbach
(Dr. Toy®) is trained in child
development, education,
psychology and special
education. She has spent
more than 40 years working
in toys and children’s
services. Dr. Auerbach has
written 15 books and three
books on toys. Dr. Toy’s
Smart Plav Smart Toys, now
in its 4th Edition,
has been published in
12 countries.
EVERY CHILD
NEEDS ONE.
This Parents’Choice Gold Seal Award winner is like no other
learning toy, because kids get totally absorbed playing with it.
It pulls on their thoughts and challenges them.
Since 1978, MightyMind® (ages 3 – 8) has been described as an
essential toy for every child, because it benefits children every
time they play with it. It brings hours of contagious fun that gives
kids the essential skills they must develop for success and
confidence. Parents love MightyMind, because they see the
benefits it brings and it keeps their kids busy for hours.
In 26 countries around the world, from Germany to France to
Canada, to China, to Japan, MightyMind® and SuperMind® are
MAKING KIDS SMARTER™ every day and KEEPING THEM
BUSY FOR HOURS™.
The reviews are unbelievable – 96.4% 5 Stars across the board
from online customer critics to child development experts. No
other activity toy has garnished such praise and such a loyal
following. Ask any parent who has one, or ask any retailer who
has been selling them, the enthusiastic praise is unanimous.
“MightyMind is the only activity toy in the entire world
that actually teaches kids how to build and solve puzzles.”
There isn’t a child in
the world that doesn’t
need the skills that
MightyMind develops
MAKES KIDS SMARTER!
MAKES KIDS THINK!
KEEPS KIDS BUSY FOR HOURS!
WATCH THE VIDEO
MAKES K__ID_S_y SmMmArRs TEmRig! htymind.coma y
AVAILABLE AT THE BEST RETAILERS IN 26 COUNTRIES AROUND THE WORLD.
© 2014 Leisure Learning Products, Inc. • P.O.B. 2697 • Stamford, CT 06906 • (203) 325-2800 • staff@mightymind.com
MAKES KIDS SMARTER
www.mightymind.com
WATCH THE VIDEO K
SEE HOW IT WORKS H
and why kids get glued to it. MightyMind is much more
than just another box of shapes and puzzles. It’s a
scientifically programmed activity that develops a child’s
essential analytical thinking skiDOs in just 30 steps.
GOOGLE MIGHTYMIND AND SEE WHAT PARENTS AND GRANDPARENTS ARE TELLING THEIR FRIENDS.
YOU MADE A GREAT CHOICE.
Mini_MightyMind® was created to demonstrate
the unique MightyMind concept of
teaching preschoolers how to build and
solve puzzles using a simple, easy and fun
linear program. It’s a very simplified version
of the original MightyMind®.
At first glance, most people think that
Mini_MightyMind is just a box of shapes
and puzzle cards – but don’t be fooled! It’s
a limited version of the original MightyMind
which is an intricate linear program comprised
of 30 steps (puzzles) arranged in a
numerical sequence that’s disguised as a
play activity. Kids get glued to it, because
it generates a feeling of success and it
builds a child’s confidence and self-esteem.
The MightyMind concept originated way
back in 1978 based on B.F. Skinner’s (the
Harvard behavorist) development of linear
programming. Disguised as a toy activity,
MightyMind develops the essential critical
analytical thinking skills that every child
must have for future success.
Please go to www.miahtvmind.com and
watch the video. It explains in detail how
MightyMind works and the amazing progress
a child achieves by following the
precisely numbered path.
MightyMind and the family of MightyMind
products and accessory upgrades are
described on the MightyMind website.
www.miahtvmind.com
Please tell your friends about MightyMind
and thank you for being a concerned
MightyMind parent, grandparent, teacher.
© 2015 Leisure Learning Products, Inc. MightyMind® and
SuperMind® are registered trademarks of Leisure Learning Products, Inc.