Download Manual
TaoTronics Bluetooth Transmitter TT-BA01.pdf
Features
TaoTronics, The Leading Brand of Bluetooth Transmitter Field. 5 years of business Experiences with more than 1.5 Million satisfied customers, First Choice of High Quality with proper price. Sunvalleytek is the only authorized seller of TaoTronics on Amazon.
- Turn your regular stereo audio devices into a Bluetooth-enabled, wireless streaming machine thru 3.5mm audio-out jack. User-friendly design of LED light and button.
- Work with any type and brand of device such as TV, PC, CD player, iPod, MP3/MP4 etc. up to 30 feet working range. Easy pairing with Bluetooth stereo headset, headphones, speakers and other Bluetooth stereo audio enabled system.
- Small, lightweight and durable! Take it with you and enjoy Bluetooth music anytime/anywhere for up to 7 hours! Can work while charging. Micro charging port.
- Wanna Save More Money? Enter code 7MHSR7IR at checkout to save $3.00 on High-Fidelity Music Transmitter for every 1 TV Transmitter TT-BA01U you purchase offered by Sunvalleytek.
Text of Manual
| E-Mail: support@taotronics.com
Tel: 1-888-456-8468 # 4(Monday-Friday: (9:00- 17:00 PST) Address: 2880 Zanker Rd, Suite 203, San Jose, CA 95134 E-Mail: support.uk@taotronics.com (United Kingdom) support.de@taotronics.com (Germany) su pport.fr@taotronics.com (France) support.es@taotronics.com (Spain) support.it@taotronics.com (Italy) EU Importer: ZBT International Trading GmbHLederstr 21a, 22525 Hamburg, Deutschland
|
Thank you for purchasing TaoTronics TT-BA01 Bluetooth Stereo Transmitter. Please read the user manual carefully to understand its features and operation. If in doubt, please email support@taotronics.com with details.
| Specifications
|
| Bluetooth Version | Bluetooth V2.1 with EDR, Class II |
| Bluetooth Profile | A2DP, AVRCP |
| Range | 33 feet (in open space) |
| Charging Power | DC 5V |
| Charging Type | Universal Micro USB Port |
| Battery | Rechargeable Li-Polymer battery |
| Working / Standby Time | 6-7 hours working / 140 hours standby |
| Charging Time | About 2 hours |
| Dimension (L*W*H) | 2.4″*0.87″*0.39″ (61″22″10 mm) |
| Weight | 0.03 Ibs (13g) |
Overview
The TT-BA01 is a high definition Bluetooth stereo transmitter, which can make any stereo device a wireless device! It does this by decoding high definition stereo signals into Bluetooth digital signals that transmit to your Bluetooth receiving device. So, you can enjoy all the music from your non-Bluetooth mobile phone, iPod, Kindle Fire and even TV, wirelessly!
This product has a built-in Lithium battery that can last for up to 7 hours on a full charge.
System Requirements
An audio or music playing device with a 3.5mm audio-out jack.
Pair with any Bluetooth stereo receiving devices that support the Bluetooth A2DP profile, such as Bluetooth headsets, speakers, etc,
| 2.Turning the transmitter On/Off
|
| Function | Operation | LED indicator |
| Turn ON | Press and hold the power button for 3-5 seconds until the LED flashes in blue | The blue LED will be on |
| Turn OFF | Press and hold the power button for about 3 seconds until the LED flashes in red | The LED will flash in red for three times and then off |
| 3.LED indicator
|
| LED Color | The status of transmitter |
| Red and blue LEDs flash alternately | Paring mode |
| Blue LED flashes twice every 5 seconds | Standby mode |
| Red LED flashed once every 10 seconds | Bluetooth connection established |
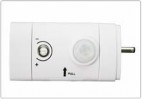
Identification of Parts
O LED indicator
Q Power button
® 3.5mm audio-in plug
O Micro USB charging port
How to Use
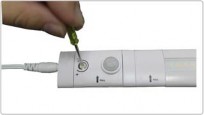
1 .Charging
The transmitter can be fully charged in around
2 hours. We recommend charging the unit for
least 4 hours before using for the first time.
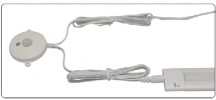
To charge the transmitter:
1) Insert the micro-USB end of the charging
cable into the charging port of the transmitter
2) Plug the USB end of the charging cable to
an USB charging adapter or any active USB port
3) The power LED will turn red when charging.
It will automatically turn OFF when the transmitter is fully charged.
Note: You can use the TT-BA01 while it is charging. The internal circuit is protected from over-charging.
4.Bluetooth Pairing
* Note: Before pairing, please make sure
your Bluetooth receiving devices support Bluetooth A2DP (Advanced Audio Distribution Profile).
In order for your TT-BA01 to pair with other Bluetooth device, you must bring the TT-BA01 into pairing mode. This is indicated by the LED indicator flashing in red and blue alternatively.
1) Start with TT-BA01 turned OFF. Please
make sure no other Bluetooth device around is in pairing mode.
2) Bring the TT-BA01 and your Bluetooth
receiving device next to each other or within 3 feet distance.
3) Press and hold the power button for about 6-7 seconds or until the LED indicator is blinking in RED and BLUE alternately. You will see the blue light blinking first. Just keep holding the button and the light will soon change to blue and red flashing.
4) The TT-BA01 is now in pairing mode. Please
follow the instruction of your Bluetooth receiving device to bring it into pairing mode and it should automatically pair with the TT-BA01.
5) Once successfully paired, the LED indicator will turn RED and then flash once every 10 seconds.
Note:
If a PIN code is required for pairing, please
try the following code: “0000 .. 1234 1111”
or “8888”.
When your device is switched on, it will automatically connect with the last paired device. To pair it with other devices, first switch off the old paired receiving device and then pair the transmitter to the new device using the same steps listed above.
The TT-BA01 will stay in pairing mode for 2 minutes at most if no pairing device is found. Afterwards, it will go into standby mode until power off.
The TT-BA01 will switch to standby mode if pairing devices is switched off or Bluetooth disconnected.
The TT-BA01 is able to be used while charging.
When the unit is charging, the RED LED will be lit constantly until charging is over. To avoid confusion when charging and using at the same time, we recommend pair the device first, and then start charging.
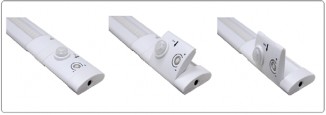
5.Reset
Sometimes, the TT-BA01 will refuse to pair with other devices even if it is in pairing mode with red and blue light flashing. You will need to reset the transmitter to make it fresh and wanting to pair again.
Do not drop or knock your transmitter on hard surfaces as it damage the interior circuit.
- Do not use chemicals or detergents to clean
the product.
° Do not scrape the surface with sharp objects.
To reset the transmitter:
| A:
|
| Q,
|
- Turn ON the transmitter
- Double press the power button • Turn OFF the transmitter
You may need to try this a few times if it does not work on your first attempt.
Care and Maintenance
Please read the following recomm-endations to keep your product running smoothly for a long time to come.
Keep the transmitter away from heat and
humidity.
- Do not put the product under direct sunlight
or hot areas. High temperatures will shorten lifespan of the transmitter, battery and/or the internal circuit board.
- Do not try to take the product apart. It may
cause serious damage.
TroubJe shooting
Q: My transmitter will not switch on.
Please recharge it and make sure the TT-BA01 has enough battery power. Plug the unit to a charger and see if the LED indicator will become red.
I am having trouble pairing and connecting to my Bluetooth pairing device.
A: Please check the following:
- Please make sure your Bluetooth device
support A2DP profile.
- Make sure turn OFF other Bluetooth devices
around
- Make sure the TT-BA01 and your device are
next to each other or within 3 feet
- You must get the TT-BA01 into pairing mode
with LED indicator flashing in red and blue alternatively
| A:
|
| Q;
|
| A:
|
- You may need to clear the memory. Please
read ‘how to clear memory’ for instructions.
Q: After connecting and paring with my Bluetooth device, I cannot hear any music from my sound system.
A: Please check the following:
- Make sure the transmitter is connected well
with the player.
- Make sure the player is playing music and
the volume is turned up.
Q: Why can I not pair with my smartphone or iPad?
A: The “I-I’-BA01 is a Bluetooth transmitter, NOT a receiver. You must connect the transmitter to a non-Bluetooth audio generating device such as a Kindle Fire, iPod, TV, computer, etc. Then pair it with your Bluetooth headset/speaker.
Note:Due to Bluetooth compression/decompression, there may be a delay in audio/video uses. This is standard among all transmitters.
Q: My device is flashing RED.
A: This means the battery is low and needs to
be charged soon.
Q: Can I use my transmitter while it is charging?
Yes, we have updated the TT-BA01 transmitter since Dec 1st 2013, so now you can use it while charging.
I haven’t used the TT-BA01 for a while, now the battery is dead. What can I do?
If the unit has not been used for more than 21 days, please charge the unit for at least 4 hours as the battery will need a full charge and be aware the LED indicator light may take several hours to show recharging is
complete.
TechnicaP Assistance
For technical assistance, please email to SUPPORT@TAOTRONICS.COM with your purchase order number and a detailed description of your issue. We normally respond to enquiries within 24 hours.
For more information, please visit www. TaoTronics.com.
Warranty
This product is covered with TaoTronics parts and labor warranty for 12 months from date of the original purchase from authorized
-9- -10-
| -12-
|
retailer and distributor. If the device fails due to a manufacturing defect, please contact TaoTronics Support (support@taotronics.com) immediately to launch a warranty claim. We will instruct you on how to return the defective unit back to us for repair and replacement.
The following are excluded from TaoTronics warranty cover:
- Device purchased as 2nd hand, used or
from unauthorized sellers
- Damage resulted from misuse and abusive
action
Damage resulted from chemical, fire
radioactive substance, poison, liquid
- Damage resulted from natural disaster
- Damage caused to any 3rd party / person
object and beyond
No return will be accepted without seller authorization.
Statement
We can only provide after sale services for products that are sold by TaoTronics or TaoTronics authorized retailer and distributor. If you have purchased your unit from a different place, please contact the seller for return and warranty issues.
-11 –
Vielen Dank, dass Sie den TaoTronics TT-BA01 Bluetooth Stereo Transmitter gekauff haben. Bitte lesen Sie die Bedienungsanleitung grQndlich durch, um sich mit allen Eigenschaften und Funktionen des TT-BA01 vertraut zu machen. Falls Sie Fragen haben sollten, schicken Sie uns bitte eine EMail mit detaillierter Beschreibung Ihres Problems an: support.de@ taotronics.com
0bersicht
Der -I-I–BA01 Bluetooth Stereo Transmitter, macht aus jedem Stereoger~t ein kabelloses Stereoger&fl Dazu werden Stereosignale entschlesselt und in digitale Bluetoothsignale umgewandelt, die an ein Bluetoothempfangsger~t gesendet werden. Dadurch erleben Sie Musikgenuss auf dem Ger~t Ihrer Wahl, ob Ihr Mobiltelefon ohne Bluetooth, iPod, Kindle Fire und sogar TV. Und das kabellos!
Der eingebaute Lithium-Akku dieses Produkts h~lt bei vollerAufiadung bis zu 7 Stunden lang.
Systemanforderungen
Ein Audio-oder Musikabspielger&t mit einem 3,5 mm Audioausausgang.
| Aufladungsdauer | ungef~hr 2 Stunden |
| Dimension (LxBxH) | 61 mm x22 mm x 10 mm |
| Gewicht | 13,6 g |
Eine Verbindung zu einem Bluetooth Stereoempfangsger~it, das das Bluetooth A2DP unterstQtzt, wie z.B. Bluetooth Kopfh6rer, Bluetooth Boxen, usw.
| ILM~drekaUbSB”1
|
| /~3.5mm weiblich~ an 2 RCA m~nnlich Kabel
|
| (‘~oTronicsTT-BA0~ IereO TranimittI
|
| Spezifikationen
|
| B luetoothversion | Bluetooth V2.1mit EDR, Klasse II |
| Bluetoothprofile | A2DP, AVRCP |
| Reichweite | 10 m (unter freiem Himmel) |
| Eingangsstrom (Aufladung) | 5 V Gleichstrom |
| Aufladung i.iber | universeller Micro-USB Anschluss |
| Akkumulator | wiederaufladbarer Lithium Polymer Akkumulator |
| Betriebsdauer / Standby Zeit | 6 bis 7 Stunden / 140 Stunden |
VorsteHung tier gedienelemente
®–q
LED Anzeige
(~) Multifunktionsknopf ®~
(~) 3,5 mm Audioeingangsstecker~~¢¢
O Micro-USB-Ladeanschluss
Wie man den TT-BA01 verwendet
- Aufladen
Der Transmitter kann in ungef~hr 2 Stunden voll aufgeladen werden. Wir empfehlen, den TT-BA01 vor der ersten Verwendung mindestens 4 Stunden lang aufzuladen.
Folgendermagen laden Sie den Transmitter auf:
1) Stecken Sie den Micro-USB-Stecker des
Ladekabels in den Ladeanschluss des
Transmitters.
2) Stecken Sie den USB-Stecker des Ladekabels in einen USB-Ladeadapter oder einen aktiven USB-Anschluss.
– 13 – – 14 –
- LED Anzeige
| =
|
3) Die LED leuchtet w~hrend des Aufladens rot. Sie schaltet sich automatisch aus, wenn der Transmitter voll aufgeladen ist.
Hinweis: Sie k6nnen die TT-BA01 w~hrend des Aufladens verwenden. Die internen Schaltkreise sind vor 0berladung gesch(Jtzt.
- Ein- und Ausschalten
| Funktion | Bedienung | LED Anzeige |
| Einschalten | Halten Sie den Knopf 3 bis 5 Sekunden lang gedr0ckt, bis die LED blau blinkt. | LED leuchtet blau |
| Ausschalten | Halten Sie den Knopf ca. 3 Sekunden lang gedr(Jckt, bis die LED rot blinkt. | LED blinkt dreimal rot und schaltet sich dann aus |
| LED Farbe | Transmitterstatus |
| LED blinkt abwechselnd rot und blau | Verbindungsmodus |
| LED blinkt alle 5 Sekunden zweimal blau | Standby Modus |
| LED blinkt alle 10 Sekunden einmal rot | Bluetooth Verbindung hergestellt |
Bluetooth Verbindung
Hinweis: Stellen Sie vor dem Herstellen der Verbindung bitte sicher, dass Ihr Bluetoothempfangsger~it das A2DP (Advanced Audio Distribution Profile) unterstLitzt.
Um eine Verbindung zwischen Ihrem TT-BA01 und einem anderen Bluetoothger~t herzustellen, mQssen Sie den TT-BA01 in den Verbindungsmodus schalten. Den Verbindungsmodus (wird angezeigt durch abwechselnd rotes und blaues Blinken) k6nnen sie folgendermal&en aktivieren:
1) Stellen Sie sicher, dass tier TT-BA01
AUSgeschaltet ist und sich kein anderes Bluetoothger~t in der N&he im Verbindungsmodus befindet.
2) Legen Sie den TT-BA01 und Ihr
Bluetoothempfangsger~t nebeneinander
-15- -16-
| 3)
|
| 4)
|
| 5)
|
oder bringen Sie die Ger&te in einen Abstand von nicht mehr als 90 cm zueinander.
Halten Sie den Knopf 6 bis 7 Sekunden lang gedreckt oder bis die LED abwechselnd rot und blau blinkt. Das blaue Licht wird zuerst Blinken. Halten Sie den Knopf einfach weiter gedr0ckt, bis die LED abwechselnd blau und rot leuchtet.
Der TT-BA01 befindet sich nun im Verbindungsmodus.Schalten Sie jetzt Ihren Bluetoothempf~nger ebenfalls in den Verbindungsmodus (folgen Sie den Anweisungen des Herstellers). Die Verbindung zwischen den beiden Ger~ten sollte automatisch entstehen.
Sobald eine Verbindung erfolgreich hergestellt wurde, blinkt die LED alle 10 Sekunden einmal rot auf.
Hinweis:
Falls zum Erstellen der Verbindung eine
PIN ben6tigt wird, versuchen Sie eine der folgenden.,,0000 ,1234 ,1111 oder ,,8888.
- Wenn Ihr Transmitter eingeschaltet wird,
verbindet es sich automatisch mit dem Get,t, mit dem es alS ietztes verbUnden war. Um eine Verbindung mit einem anderen
Ger~t herzustellen, schalten Sie bitte das Ger~t zu dembisher eine Verbindung bestanden hat AUS und f0hren Sie die Herstellung einer Verbindung gem~r& den oben genannten Schritten durch.
Der TT-BA01 bleibt h6chstens 2 Minuten im Verbindungsmodus. Wenn bis dahin kein Ger~t fer eine Verbindung gefunden wird, kehrter zur0ck in den Standby Modus.
Der TT-BA01 versetzt sich in den Standby-Modus, wenn das verbundene Ger~t abgeschaltet wird oder das Bluetoothsignal unterbrochen wird.
Der TT-BA01 kann verwendet werden, w~ihrend sie aufgeladen wird.
Wenn der Transmitter aufgeladen wird, leuchtet die LED rot bis die Aufladung vollst&ndig abgeschlossen ist. Um Verwirrungen beim gleichzeitigen Aufladen und Verwenden zu vermeiden, empfehlen wir die Verbindung zuerst herzustellen und dann die Aufladung zu beginnen.
- Reset (ZurLicksetzen)
Manchmal schafft es der TT-BA01 nicht eine
Verbindung mit anderen Ger~ten herzustellen,
obwohl er im Verbindungsmodus ist. In diesem
-17- -18-
| F”
|
| A:
|
Fall m0ssen Sie einen Reset ausfOhren, um den Transmitter wieder in seinen urspr0nglichen Zustand zurQck zu versetzen. Dann k6nnen Sie wieder Verbindungen herstellen.
Folgenderma6en k6nnen Sie den Transmitter zun3cksetzen:
- Schalten Sie den Transmitter EIN
o Dr0cken Sie Knopf zweimal schnell
hintereinander
- Schalter Sie den TransmitterAUS
Eventuell mQssen Sie diesen Vorgang einige Male durchfOhren, falls es beim ersten Mal nicht funktionieren sollte.
Bitte halten Sie sich an die folgenden Empfehlungen, damit Ihr Produkt for lange Zeit weiter problemlos I~uft:
- Halten Sie den Transmitter von Hitze und
Feuchtigkeit fern. • Legen Sie den Transmitter nicht in direktes
Sonnenlicht oder an heil~e Pl~tze. Hohe Temperaturen verk0rzen die Lebensdauer des Transmitters, des Akkus und der internen Leiterplatte.
Versuchen Sie nicht, das Produkt zu zerlegen. Dadurch k6nnen schwere Sch&den entstehen.
o Lassen Sie den Transmitter nicht auf harte
Oberfl~chen fallen. Das kann die internen Schaltkreise besch~digen.
o Benutzen Sie keine Chemikalien oder
Putzmittel, um das Produkt zu reinigen.
° Kratzen Sie nicht mit scharfen
Gegenst&nden an der Oberfl&che des Transmitters.
ProbUembehebung
Mein Transmitter I~sst sich nicht einschalten.
Bitte OberprOfen Sie, ob der TT-BA01 genug Strom hat und laden Sie ihn gegebenenfalls auf. Verbinden Sie den Transmitter mit einem Ladeger~t und kontrollieren Sie, ob die LED Anzeige rot leuchtet.
F: Ich habe Probleme mit dem Verbindung–saufbau zu meinem Bluetoothger~it.
A: Bitte 0berpr0fen Sie folgendes:
- Bitte stellen Sie sicher, dass Ihr Blue-
toothger~t das A2DP unterstOtzt.
– 19- -20-
| F:
|
| A;
|
| A:
|
| F”
|
| A: Der TT-BA01 ist ein Bluetooth Transmitter mindestens 4 stunden iang auf, weil das
(Sender) und KEIN Empf~nger. Sie m~Jssen Ger&t eine voile Aufladung benBtigt. Achten
|
Schalten Sie alle anderen Bluetoothger~te in der Umgebung AUS.
Stellen Sie sicher, dass der TT-BA01 und Ihr Ger~t sich nebeneinander oder nicht weiter als 90 cm voneinander entfernt befinden.
Schalten Sie den TT-BA01 in den Verbindungsmodus (LED blinkt abwechselnd rot und blau).
Sie mL~ssen eventuell den Speicher 16schen. Bitte lesen Sie dazu die Anweisungen im Abschnitt ,,Wie man den Speicher IBscht”.
Nach dem Verbindungsaufbau mit meinem Bluetoothger~it kann ich keine Musik von meiner Stereoanlage h6ren.
Bitte 0berprQfen Sie folgendes:
Stellen Sie sicher, dass der Audioeing-angsstecker des Transmitters mit dem Abspielger~t verbunden ist.
Stellen Sie sicher, dass die Anlage Musik abspielt und die Lautst~rke nicht zu niedrig eingestellt ist.
Warum kann ich keine Verbindung mit meinem Smartphone oder iPad herstellen?
den Audiostecker des Transmitters mit einem Abspielger&t verbinden, das kein eigenes Bluetoothsignal erzeugt, wie z.B. Kindle Fire, iPod, TV, Computer, usw. Dann k6nnen Sie eine Bluetoothverbindung mit Ihren Bluetooth KopfhBrern oder Bluetooth Boxen herstellen.
Hinweis: Aufgrund der Bluetooth Komprimierung und Dekomprimierung kann es zu VerzBgerungen beim Abspielen von Audio/Video kommen. Das ist normal bei Transmittern.
| F:
A:
|
Die LED meines Transmitters blinkt rot.
Das signalisiert Ihnen, dass der Akku fast leer ist und der TT-BA01 wieder aufgeladen werden muss.
F: Kann ich den Transmitter benutzen w~ihrend ich ihn auflade?
Ja, wir haben am 01.12.2013 ein Update in den TT-BA01 Transmitter integriert, das dies ermBglicht.
F: Ich habe den TT-BA01 I~ingere Zeit nicht benutzt und jetzt ist der Akku leer. Was soil ich tun?
A: Falls der Transmitter I~nger als 21 Tage
nicht benutzen wurde, laden Sie ihn bitte
– 21 – – 22 –
Sie darauf, dass die LED Anzeige einige Stunden braucht, um den Abschluss der Aufladung zu signalisieren.
Technische Hilfe
FQr technische Hilfe schreibenSie uns bitte eineEMail an: support.de@taotronics.com
Bitte senden Sie uns bei der Kontaktaufnahme Ihre Bestellnummer und eine detaillierte Beschreibung des Problems. FQr gewShnlich antworten wir innerhalb von 24 Stunden.
Weitere Informationen finden Sie auf: www. TaoTronics.com
Garantie
Dieses Produkt unterliegt der TaoTronics Material- und Herstellungsgarantie fQr einen Zeitraum von 12 Monaten, gQItig ab Kaufdatum vom autorisierten H&ndler und Vertriebsdienstleister. Falls das Ger&t aufgrund eines Produktionsfehlers defekt sein sollte, kontaktieren Sie bitte sofort den TaoTronics Kundendienst (per EMail unter: support.de@ taotronics.com), um einen Garantieanspruch
zurQcksenden k6nnen.
Folgende F~lle sind von der TaoTronics Garantie ausgeschlossen:
- Produkt wurde secondhand, used oder von
einem nicht autorisierten H~ndler gekauft
- Sch~den durch Missbrauch oder falsche
Anwendung
° Sch~den durch Chemikalien, Feuer,
radioaktive Substanzen, Gift oder
Flessigkeiten • Sch~den durch Naturkatastrophen oder
hShere Gewalt
- Sch&den, die einer dritten Partei, Person,
Objekt und darQber hinausgehend entstanden sind
Ohne vorherige Autorisierung durch den H~indler werden Retouren NICHT akzeptiert.
Erkn rung
Wir bieten unseren Kundendienst nur for Produkte an, die von TaoTronic oder einem durch TaoTronics autorisierten H~ndler und Vertriebsdienstleister verkauft wurden. Falls Sie
geltend zu machen. Wit werden Ihnen IhrGer~tvoneinemanderen H&ndlergekauft
Anweisungen geben, wie Sie uns das defekte haben, wenden Sie sich bitte an Ihren Verk~ufer Produkt Zwecks Reparatur oder Ersatz zur Regelungvon GarantieansprQchen.
– 23 – – 24 –
| TT-BA01
|
Muchas gracias per su compra de TaoTronics TT-BA01 Bluetooth Est6reo Transmisor. Per favor lea el manual de usuario atentamente para conocer las caracterfsticas y operaciones mejor. Cualquier duda, per favor envienos un correo a support.es@taotronics.com con los detalles.
audio o video con el tamafio del puerto de 3,5mm y soporta Bluetooth A2DP, tal come Bluetooth est6reo auriculares, Bluetooth altavoces, etc.
Contenidos deP Paquete
/~ble de 3,5mm”‘~
Icon punta hembreI
I& RCA roach° /
| Especificaciones
|
| Versibn de Bluetooth | Bluetooth V2.1 with EDR. Class I1 |
| Perfil de Bluetooth | A2DP. AVRCP |
| Alcance Efectivo | 33 feet (en el espacio abierto) |
| Voltaje de Entrada | DC 5V |
| Tipo de Carga | Universal Micro USB Puerto |
| Baterfa | Li-Polymer baterfa recargable |
| Tiempo de trabajo/en espera | 6-7 horas de trabajo/140 horas en espera |
| Tiempo de Carga | Alrededor de 2 horas |
| Dimensibn (L*W*H) | 2.4,,*0.87,,*0.39, (61,22,10 mm) |
| Peso | 0.03 Ibs (13g) |
TT-BA01 es un bluetooth transmisor est6reo de alta definici6n. Y puede decodificar sefiales est6reos de alta definici6n al sefiales digitales de bluetooth. Mt~sica de su tel6fono m6vil, PC o otros dispositivos de audio se puede transmitir inal&mbricamente a su dispositivo est6reo de receptor de bluetooth. Entonces podrfa disfrutar mtJsica en cualquier dispositivo est~reo inal~mbricamente come Smartphone, iPod, Kindle Fire o TV.
Este producto tiene una bateria integrada de Li-polfmero, Io que puede soportar TT-BA01 funcionar 7 horas despu6s de una carga completa.
Sistema Requisite
Cualquier dispositivo o receptor de salida de
– 25 – – 26 –
ndentificaciSn de Partes
O LED indicador
Q but6n de Multi-funci6n
(~) Audio-in Enchufe de 3,5mm
Q Micro USB puerto de carga
- Encender/Apagar el Transmisor
| Funcidn | Operacibn | LED indicador |
| Encenderlo | Pulsebot6n de multi-funci6n para 3segundos hasta que el indacador brilla en azul | El azul LED se enciende |
| Apagarlo | Pulsebotdn de multi-funci6n para 3segundos hasta que el indicador brilla en rojo | Indicador brillar~ en rojo tres vecesy se apagar& luego |
| 3. LED indicador
|
| 2)
|
| LED Color | Estado del Transmisor |
| Rojo y Azul LEDs brillan alternativamente | Modo de Emparejamiento |
| Azul LED brilla dos veces cada 5 segundos | Est~ listo para usar |
| Azul LED brilla una vez cada 10 segundos | Conexionado con Bluetooth |
| 3)
|
&C6mo se usa?
- Carga
El transmisor se puede cargar completamente alrededor de 2 horas. Le recomendamos que carga el dispositivo por Io menos 4 horas antes del primer uso
Cargar el transmisor
1) Enchufe el micro-USB del cable de carga
en la puerta de carga del transmisor
Enchufe el USB puerto del cable de carga en un USB adaptador de carga o cualquier USB puerto activo
El LED se encender~ en rojo cuando est~ cargado. Se apagar~ autom&ticamente cuando se carga completamente.
Nota: Puede utilizar el TT-BA01 cuando est~ cargando. El circuito interno se proteje desde el exceso de carga
– 27 – – 28 –
- Emparejamiento de Bluetooth
Nota: Antes del emparejamiento, por favor asegure de que su receptor de Bluetooth soporta A2DP (Advanced Audio Distribution Profile).
Para emparejar su TT-BA01 con los otros dispositivos de Bluetooth, tiene que tocar el TT-BA01 en el modo de emparejamiento. Se indica por el indicador de LED, Io que est~ brillado en rojo y azul alternativamente
1) Empezamos desde que se apaga el TT-BA01.
Por favor asegure que no hay otro dispositivo en el modo de emparejamiento.
2) Ponga el TT-BA01 junto con su dispositivo
para recibir Bluetooth dentro de la distancia de 3 feet.
3) Pulse y mantenga el Bot6n de Multi-Funci6n para 6-7 segundos o hasta que el indicador de LED est~ brillado en rojo y azul alternativamene. Puede ver la luz azul parpadeada primero. Y mantenga en pulsar el bot6n, luego la luz cambia a brillar en azul y rojo.
4) Ahora TT-BA01 est~ en el modo de
emparejamiento. Por favor sigue las instrucciones de su dipositivo de recibir
Bluetooth a tocar al modo de emparejamiento y puede emparejar con TT-BA01 autom~ticamente.
5) Una vez emparejado con 6xito, el indicador
LED cambiarA en rojo y brillar~ una vez cada 10 segundos.
Nota:
Si requiere un c6digo de PIN para el emparejamiento, por favor trate los c6digos sig uientes:”0000″ “1234” “1111” or “8888”.
Cuando su dispositivo se enciende, conectar~ autom~ticamente con el t~ltimo dispositivo emparejado.Para emparejar con los otros dispositivos, primero apague el dispositivo del viejo emparejamiento, y empareja el transmisor con el nuevo dispositivo usando los mismos pasos arriba.
El TT-BA01 estar& en el modo de emparejamiento para 2 minutos a Io m~s si no se encontra ning6n dispositivo emparejado. Posteriormente entrarA en el modo de espera hasta que se apaga
El TT-BA01 entrar& en el modo de espera si se apagan los dispositivos emparejados o descontacta Bluetooth
cargando
– 29 – – 30 –
Cuando la unidad est~ cargando, el LED rojo est& brillando constantemente hasta que termina la carga. Para evitar las confusiones cuando est~ cargado y utilizado al mismo tiempo, le recomendamos que hace el emparejamiento primero, y luego comienza a cargarlo.
- Reinicializar
Algunas veces, el TT-BA01 rechazar~ a emparejar con los otros dispositivos aunque est& en el modo de emparejamiento con la luz parpadeando en azul y rojo. Hay que reinicializar el transmisor a brillar y puede emparejarse otra vez.
Para reinicializar el transmisor:
Mantenga el transmisorlejos de calory humedad.
No Io ponga este producto debajo directamente la luz del sol o lugares calores. Alta temperatura va a acortar la vida del dispositivo electr6nico y su bateria
No intente dividir este producto, que se puede hacer dado f&cilmente.
No Io deje tirar al suelo o al cualquier artfculo duro, que puede romper el circuito interior.
No Io limpie con agentes quimicos a este producto.
No Io raspe a la superficie del producto con cosas puntiagudas.
° Enciende el transmisor
° Presione dos veces el bot6n de encendido
- Apaga el transmisor
Podria probar varias veces si no funciona con su primer intento.
Mantenimiento
Antes de utilizar este producto, por favor lea las siguientes recomendaciones, estos consejos
Preguntas & Respuestas Frecuentes
P: &Per qu~ no puedo encender mi transmisor TT-BA01?
R: Por favor asegure si el transmisor tiene suficiente energia para funcionar. Si no, hay que recargarlo antes de utilizar.
P:Tengo problemas conexion,~ndolo y
pueden ampliar la vida del transmisor y la emparej~ndolo con mi dispositivo de
bateria, bluetooth
-31 – – 32 –
| Q-
|
| P;
|
| A:
|
| Q:
|
| A:
|
| P:
|
| A:
|
| conexionarlo con un dispositivo cual no ! tiene bluetooth tal como Kindle Fire, iPod,
|
Por favor chequea los siguientes:
| Por favor examine si su dispositivo de bluetooth soporta bluetooth A2DP.
|
Confirme que el transmisor y su dispositivo est~n en la distancia requisita de emparejamiento de 1 metro.
Examine si los dos dispositivos est~n en el modo de emparejamiento.
Limpie la memoria del transmisor. Siga “~,C6mo limpiar la memoria?” en concreto.
Despu~s de conectar y emparejar con mi Bluetooth dispositivo, no puedo oir mt~sica desde mi sistema de sonido
R: Por favor chequea los siguientes:
Asegure que el transmisor est~ conectado bien con el jugador
Asegure que el jugador est~ jugando la mt~sica y el volumen ya se enciende.
&Por qu~ no puedo emparejar el transmisor con mi smartphone y iPad?
TT-BA01 es un Bluetooth transmisor, NO ES UN RECEPTOR. $61o puede usted
TV, ordenador etc. Luego empar6jelo con su Bluetooth auriculares/altavoces.
Nota: A causa de la compresi6n/descompresi6n de Bluetooth, el retraso de audio/video es muy comt3n entre todos los transmisores.
P: El indicador est& brillando en rojo
R: Eso le avisa el bajo nivel de la energfa del
transmisor y se necesito recargar pronto.
&Puedo utilizar el transmisor cuando est& cargando?
Si, hemos mejorado el TT-BA01 transmisor desde Dec 1 2013, por eso ahora puede utilizarlo en el proceso de carga
No he utilizado el TT-BA01 por un tiempo, ahora la bateria ya est& muerta. &Cbmo puedo hacer?
Si el dispositivo no se ha utilizad0 m~s de 21 dfas, por favor c&rguelo para 4 horas por Io menos porque la baterfa necesita una carga completa y varias horas despu6s la luz de LED indicador le muestra que la recarga ya est~ completa.
– 33 – – 34 –
Asistencia Tbcnica
Para la asistencia t6cnica, por favor envie correo a SUPPORT.ES@TAOTRONICS. COMcon su ntJmero del pedido y las descripciones detalladas de su duda. Normalmente vamos a responderle dentro de 24 horas.
Para m~s informaciones, por favor visite www.
TaoTronics.com
Garantia
Ofrecemos una garantia con el periodo de 12 meses desde el dfa de compra original de los distribuidores autorizados. Si el dispositivo falla debido a un defecto de fabricaci6n, por favor contacte TaoTronics Support (support@ taotronics.com) inmediatamente para iniciar una reclamaci6n de garantfa. Le indicaremos c6mo devuelva la unidad defectuosa para reparaci6n o reemplazo
Esta garantia no soporta estropeado a causa
de las siguientes situaciones:
° Dispositivo comprado como segunda mano,
usado o desde vendedor desautorizado
- DaSado por mal uso o acci6n abusada
Da5ado por qufmicos, fuego, sustancia
radiactiva, veneno, I[quido
Dadado pot desastre natural
- DaSado por cualquiera tercera parte/
persona/objeto y m~s all~
Ninguna devolucibn ser& aceptada sin la autorizacibn de vendedor.
Declaraci6n
S61o podemos ofrecer servicios de postventa de los productos que se venden por TaoTronics o TaoTronics autorizados minorista y el distribuidor. Si usted ha comprado el dispositivo desde un lugar diferente, por favor p6ngase en contacto con el vendedor para cuestiones de devoluci6n y de garantia
– 35 – – 36 –
Merci pour I’achat du Transmetteur St~r6o Bluetooth. Veuillez lire attentivement ce manuel pour connaftre son op6ration et ses sp6cifications. En cas de doute, veuillez bien nous 6crire avec vos probl~mes d6taill6s
I’adresse email : Support.fr@taotronics.com.
Un appareil de r~ception de st6r6o Bluetooth qui soutient le profil de Bluetooth A2DP, tels que les casques audio de st6r6o Bluetooth, haut-parleur Bluetooth, etc…
Contenu du paquet
| Bntroduction
|
| Le TT-BA01 est un transmetteur st~r6o
|
| Bluetooth de haute d6finition, qui peut rendre n’importe quel appareil st6r6o un appareil sans fil! Elle fonctionne en d6codant les
|
| Sp6cifications
|
| Version de bluetooth | Bluetooth V2.1 avec EDR, Classe I1 |
| Bluetooth Profile | A2DP, AVRCP |
| Distance d’dffectivement | Environ 10 m~tres (darts un espace ouvert) |
| Puissance de recharge | DC 5V |
| Type de recharge | Port de Micro USB universel |
| Batterie | Batterie rechargeable au LI-polym6re |
| Temps de travail/en veille | 6-7 h de travail / 140 h en veille |
| Temps de recharge | Environ 2 h |
| Dimefisiofi (L*L*H) | 61″22″10 mm |
| Poids | 13g |
signaux st6r6o de haute d6finition en signaux num6riques Bluetooth qui peuvent 8tre transmis ~ votre appareil de r6ception du st6r6o Bluetooth. Ainsi, vous pouvez profiter de toute la musique de votre t616phone mobile non-Bluetooth, iPod, Kindle Fire et meme la t616vision, sans il!!
Ce produit dispose d’une batterie int6gr6e au lithium. La dur6e de la batterie sera au moins 7 heures apr~s changement complete.
Configuration Recommand e
Un lecteur de musique ou d~audio avec une prise de sortie audio de 3,5mm.
– 37 – – 38 –
Aper§u de TT°BA01
0 LED indicateur ®~ (~) Bouton de multi-fonction (~
® Prise d’audio-entr~e 3,5mm
@ Port de recharge Micro USB
Remarque • Vous pouvez utiliser le TT-BA01 quand il est en train de recharger. Son circuit interne est prot6g6 contre les sur-charge
| 2. D~marrage et s’arr6te
|
| Fonction | Opdration | LED indicateur |
| D6marrage | Appuyez sur le bouton d’alimentation pendant 3-5 secondes jusqu’& LED clignote en bleu | LED bleu s’allume |
| Arr#te | Appuyez sur le bouton d’alimentation pendant environ 3 secondes jusqu’& LED clignote en rouge | LED clignote en rouge pour trois fois et puis s’~teint |
| 2)
|
| 3. LED indicateur
|
| Couleur de LED | L’6tat du transmetteur |
| LED rouge et bleu clignotent en alternance | Mode d’appariement |
| LED bleu clignote 2 fois chaque 5 secondes | Mode de veille |
| LED rouge clignote chaque 10 secondes | Connexion Bluetooth ~tablie |
Commencer ‘utilisation
- Charger votre transmetteur
Le transmetteur peut 6tre compl6tement recharg6 en environ 2 h. Nous vous conseillons de le charger au moins de 4 heures avant la premiere utilisation.
Pour charger le transmetteur
1) Ins6rez I’extr~mit6 du c&ble de charge
de Micro USB au port de recharge du
transmetteur
Branchez I’extr6mit6 du c&ble de charge d’USB & un adaptateur de charge d’USB ou & n’importe quel port d’USB actif
| L’indicateur LED s’allume en rouge Iors du chargement et s’6teint automatiquement
|
3)
quand le transmetteur est €ompl6tement charg~e
– 39 – – 4O –
| 4)
|
| Appariement avec les pdriphdriques Bluetooth
|
| Maintenant le transmetteur TT-BA01 est en mode d’appariement. Veuillez suivre les instructions de votre appareil de r6ception Bluetooth pour le mettre aussi en mode d’appariement, puis il doit appairer automatiquement avec le TT-BA01.
|
| =
|
| Remarque: Avant d’appairer le Bluetooth, veuillez bien assurer que vos appareils de rdception de Bluetooth s’adaptent au Bluetooth A2DP (Advanced Audio Distribution Profile)
|
| 5)
|
| Si la connexion est bon, LED indicateur s’allume en rouge, et puis cligonte une fois chaque 10 secondes.
|
| Afin d’appairer votre TT-BA01 avec un autre p~riph6rique Bluetooth, veillez mettre le TT-BA01 en mode d’appariement. Ceci est indiqu6 par LED indicateur rouge et bleu clignotant en alternance.
|
| Remarque :
|
| S’il faut un code PIN pour I’appariement, veuillez
essayer les codes suivants : (( 0000 >>, (( 1234 >>, (( 1111 >> et (( 8888 >>
|
| 1)
|
| Commencez par le TT-BA01 6teint.
Veuillez assurer que d’autres p6riph6riques Bluetooth autour ne sont pas en mode d’appariement.
|
| Le transmetteur se connectera automatiquement avec rappareil qu’est appari6 la derni6re lois. Si vous avez besoin de connecter le transmetteur avec des autres appareils Bluetooth, veuillez fermer le dernier appareil r6cepteur appari6, et suivre les 6tapes ci-dessus, enfin apparier le transmetteur avec le nouvel appareil.
|
| 2)
|
| Maintenez la distance entre votre
transmetteur et votre appareil de r6ception Bluetooth moins de 1 m6tre.
|
| 3)
|
| Appuyez sur le bouton d’alimentation pendant 6-7 secondes ou jusqu’,~ LED indicateur rouge et bleu clignote en alternance. Vous verrez que LED bleu clignote en premier. II suffit de continuer ~ appuyer sur le bouton et LED va
|
| Le TT-BA01 restera en mode d’appariement pendant 2 minutes tout au plus si aucun appareil d’appairage se trouve. Ensuite, il se met en mode de veille jusqu’~ ce qu’il s’6teigne.
Le TT-BA01 passe en mode de veille si
|
| bientot changer en chgnotement alternatif en I’appareil de reception Bluetooth est etemt
bleu et en rouge, ou Bluetooth est d6connect&
|
– 41 – – 42 –
Le TT-BA01 peut ~tre utilis6 quand il est en train de charger.
Lorsque le TT-BA01 est en charge, LED rouge s’allume constamment jusqu’& ce que le chargement soit termin& Pour ~viter toute confusion quand vous chargez et utilisez le transmetteur en m6me temps, nous vous recommandons d’appairer d’abord I’appareil de r~ception, puis de commencer ~ charger le transmetteur.
- Remettre le TT-BA01
Parfois, le TT-BA01 refusera d’appairer avec d’autres appareils, m6me s’il est en mode d’appariement avec le clignotement alternatif en rouge et en bleu de LED. Vous aurez besoin de remettre le transmetteur pour le faire appairer de nouveau.
Pour remettre le transmetteur :
- Allumez le transmetteur
- Appuyez 2 fois sur le bouton d’alimentation
Entretien et maintenance
Veuillez lire les conseils suivants pour obtenir une Iongue esp6rance de vie de votre produit.
Ne mettez pas votre transmetteur dans la
situation chaud ou humide.
- Ne mettez-le pas directement sous le soleil
ou dans un endroit chaud, la vie de dur~e du transmetteur, de la batterie ou de la carte de
circuit interne sera r6duite dans la situation d’haute temp6rature.
° N’ essayez pas de d6monter le transmetteur.
Cela peut causer de graves dommages
° Evitez la chute d’appareil d’un endroit 61ev6
ou de le frapper sur les substances dures,
ceia causerait I’endommagement int6rieur.
- N’utilisez pas les produits chimiques ou
d~tergents pour nettoyer votre appareil.
° Ne rayez pas ia surface avec les objets
tranchants.
- Eteignez le transmetteur 1. Q: Pourquoi mon transmetteur ne peut
Vous avez peut-~tre ~ essayer ies 6tapes ci- pas 6tre allum~?
dessus pour plusieurs fois si !e transmetteu[ ne A~ Veui!!ez !e recharger !a
fonctionne pas apr~s votre premiere tentativepuissance de batterie de TT-BA01 est suffisante. Branchez le transmetteur ~ un
-43 – – 44 –
| .
|
| A:
|
| 5)
|
| ,
|
| .
|
| A:
|
chargeur pour v6rifier si LED indicateur s’allumera en rouge.
Q: Pourquoi le TT-BA01 ne peut pas s’apparier et se connecter avec mes appareils de rSception Bluetooth?
A: Veuillez v6rifier les points suivants:
1) Confirmez-vous que I’appareil de r6ception
Bluetooth soutient I’A2DP.
2) Assurez-vous que vous avez 6teint d’autres appareils de r6ception Bluetooth autour.
3) Assurez-vous que la distance entre le TT-
BA01 et I’appareil de r~ception Bluetooth est moins de 1 m#tre en appariant.
4) Mettez-vous le TT-BA01 en mode
d’appariement avec le clignotement alternatif en rouge et en bleu de LED indicateur.
Vous avez peut-#tre besoin d’effacer la m6moire. Veuillez bien lire << comment effacer la m6moire >> pour obtenir des instructions.
Q: Pourquoi je ne peux pas ~couter la musique par les appareils de rdception Bluetooth apr~s I’appairage?
A: Veuillez v6rifier les points suivants:
2) Assurez-vous que le lecteur joue de la musique et le volume est mont6.
- Q: Pourquoi le TT-BA01 ne peut pas ~tre appair~ avec mon smart phone ou i.Pad?
Le TT-BA01 est un transmetteur Bluetooth, PAS un r6cepteur. Branchez-vous le TT-BA01 dans un appareil sans r6cepteur Bluetooth, par exemple le KindleFire, iPod, t~l~viseur, etc. Ensuite, il appariera automatiquement avec votre casque audio/ haut-parleur de st~r6o Bluetooth pendant le processus d’appairage.
Remarque: En raison de compression / d6compression de Bluetooth, il peut y avoir un retard dans I’utilisation audio / vid6o. C’est normal chez tousles transmetteurs.
- Q: Pourquoi mon 1-F-BA01 cligonte en rouge? A: Cela signifie que la batterie est faible et doit
#tre recharg6e rapidement.
Q: Puis-je utiliser mon transmetteur quand il est en train de recharger?
Oui, nous avons mis & nouveau le transmetteur TT-BA01 depuis le ler d~cembre 2013, alors
maintenant vous pouvez I’utiliser pendant le
1) Assurez-vous que le transmetteur connecte
bien avec le lecteur, chargement.
-45 – – 46 –
| .
|
| A:
|
Q: Je n’ai pas utilisd le TT-BA01 pendant un certain temps, maintenant la batterie est morte. Que puis-je faire?
Si letransmetteur n’a pas ~t6 utilis6 pendant plus de 21 jours, veuillez le recharger pour au moins 4 h, c’est parce que la batterie aura besoin d’une charge compl6te. Soyez conscient que LED indicateur peut prendre plusieurs heures pour vous montrer I’ach6vement de recharge.
Assistance technique
Pour obtenir une assistance technique, veuillez nous 6crire avec votre num~ro de commande et une description d6taill6e de votre probl6me ~ I’adresse emai suivant: SUPPORT.FR@TAOTRONICS.COM. Nous r6pondons normalement ~ vos demandes de renseignements dans les 24 heures.
Pour plus d’informations, veuiltez visiter notre site: www.TaoTronics.com.
La Garantie
Le TT-BA01, couvert par les pi6ces et le main-d’oeuvre de la marque TaoTronics, est sous garantie pendant 12 mois ~ compter de la
veuillez contacter TaoTronics Support (support. fr@taotronics.com) imm6diatement pour lancer une demande de garantie. Nous vous donnerons des instructions qui vous aideront
nous retourner le produit d6fectueux pour la r~paration ou le remplacement.
Cette garantie ne couvre pas les produits endommag6s par les conditions suivants:
- Appareil achet6 en 26me main, utilis6 ou de
vendeurs non autoris~s
- Endommag~ par usage impropre ou abusif • Endommag6 par produits chimiques, feu,
substance radioactive, poison ou liquide
- Endommag6 par des catastrophes naturelles • Dommages caus6s par 36me parti /
personne / objet et autre
Aucun retour ne sera accept6 sans rautorisation de vendeur.
D6claration
Nous fournissons seulement des services apr#s-vente pour les produits qui sont vendus par TaoTronics ou les d6taillants et distributeurs autoris6s par TaoTronics. Si vous avez achet~
date de l!achat initial des d6taillants et des votm appareil d:un autre patti, veuillez contacte[
distributeurs autoris6s. Si le transmetteur tombe le vendeur-I~ pour les questions de retour et de en panne & cause d’un d6faut de fabrication, garantie.
– 47 – – 48 –
| Versione Bluetooth | Bluetooth V2.1 con EDR, Classe II |
| Profilo Bluetooth | A2DP, AVRCP |
| Gamma | 33 piedi (nello spazio aperto) |
| Potenza di Ricarica | DC 5V |
| Tipo di Ricarica | Porta Micro USB Universale |
| Batteria | Batteria Ricaricabile Li Polymer |
| Tempo di Durata / Standby | 6-7 ore di durata / 140 ore di standby |
| Tempo di Ricarica | Circa 2 ore |
| Dimensione(L*W*H) | 61″22″10 mm |
| Peso | 13g |
Grazie per aver acquisto il TaoTronics TT-BA01 Trasmettitore Bluetooth Stereo. Si prega di leggere attentamente questo manuale per conoscere le caratteristiche e le operazioni. Se avrebbe qualsiasi dubbio, si prega di contattarci con support.it@taotronics.com
Introduzione
II TT-BA01 6 un Tramettitore Bluetooth Stereo
ad alta definizione, che si pu6 rendere qualsiasi dispositivo stereo di un dispositivo WirelessJ Decodifica i segnali stereo ad alta definizione ai segnali digitali Bluetooth che trasmettono al dispositivo ricevente Bluetooth. Potrebbe godere della musica con i dispositivi non-Bluetooth come cellulare, iPod, Kindle Fire e anche Tk/in modalit& wireless!
Questo prodotto ha una batteria al litio incorporata che si pu6 durare per 7 ore quando si ~ completamente caricato.
Requisiti Sistema
Un dispositivo audio o riproduzione musica con
un jack di uscita audio da 3.5mm.
Accoppiarsi quatsiasi dispositivo ricevente Bluetooth Stereo che supporta il profilo
Bluetooth A2DP, come Auricolari e Altoparlanti Bluetooth, ecc.
Confezione
Ijackda 3,5mm |
I femmina a 2 RcaI
I maschi. ,~ |
– 49 – – 5O –
O Indicatore LED ®7
Q Pulsante di Pontenza ®’)~!~1 ~}~.r,o~
G 3.5mm audio-in plug
® Porta Micro USB di ricarica
- Accendere / Spegnere il dispositivo
| Funzione | Operazione | Indicatore LED |
| Accendere | Premere e tenere il pulsante di pontenza per 3-5 secondi fino a il LED lampeggia Blu | II LED Blu si accende |
| Spegnere | Premere e tenere il pulsante di pontenza per circa 3 secondi flno a il LED lampeggia Rosso | IILED Rosso siaccede per 3 volte e poisi spegne |
| 3. Indicatore LED
|
| 2)
|
| Colore LED | Stato di Trasmettitore |
| II LED Lampeggia alternatamente in rosso e blu | Modalit~ di accoppiamento |
| II LED blu lampeggia 2 volte ogni 5 secondi | Modalit& di standby |
| !! LED [osso lampeggia ! volta ogni 10 secondi | Bluetooth connesso |
| 3)
|
Guida Untroduttiva
1 .Ricarica
Questo trasmettitore si pu6 ricaricare completamente per 2 ore. Si consiglia di ricaricare per almeno 4 ore prima di utilizzarlo.
Per ricaricare il trasmettitore
1) Inserire I’estremit& maschio del cavo USB nella porta di ricarica del trasmettitore.
Plusare I’estremit& maschio del cavo USB a un adattatore di ricarica USB o alter porte USB.
Quando si ricarica, il LED diventer~ a rosso. Si spegne automaticamente quando il trasmettitore ~ completamente ricarica.
Nota: Potrebbe utilizzare il TT-BA01 quando …. sie ricarica. II circuito interno# protetto da sovraccarica.
– 51 – – 52 –
| – 53–
|
- Accoppiare Bluetooth
* Nota: prima dell’accoppiamento, si
prega di assicurarsi che i Suoi dispositivi riceventi Bluetooth supportano Bluetooth A2DP (Advanced Audio Distribution Profile).
Per accoppiarsi con altri dispositivi, necessario portare il TT-BA01 in modalita di accoppiamento, ci6 che I’indicatore LED lampeggia alternativamente rosso e blu.
1) Cominciare dallo Stato disattivato. Si
prega di confermare che nessun altro dispositivo Bluetooth intorno 6 in modalita di accoppiamento.
2) Mettere il Trasmettitore e il dispositivo
ricevente entro 1 metro.
3) Premere e tenere premuto il pulsante
di pontenza per 6-7 secondi o fino a quando il LED lampeggia alternatamente in rosso e blu. II LED Blu lampeggia prima, tenendo premuto il plusante e il LED sara diventato blue rosso.
4) Adesso il TT-BA01 sta in modalita di accoppiamento. Si prega di seguire le istruzione del Suo dispositivo Bluetooth per
accoppiamonto con il TT-BA01.
5) Quando i dispositivi sono accoppiati con successo, il LED diventa rosso e poi lampeggia una volta ogni 10 secondi.
Nota:
Se viene richiesto un codice PIN per accoppiamento, si prega di provare i codici seguenti: “0000” “1234” “1111” or “8888”.
Quando il trasmettitore ~ acceso, si collega automaticamente con I’ultimo dispositivo accoppiato. Per accoppiarlo con gli altri dispositivi, spegnersi prima I’ultimo dispositivo di ricezione e quindi accoppiare il trasmettitore al nuovo dispositivo.
II TT-BA01 sara rimasto in modalita di accoppiamento per 2 secondi al massimo se non trovarsi dispositivo accoppiato. Poi, si entra alia modalita standby fino a quando si scaricato.
II TT-BA01 sara entrato in modalita di standby se il dispositivo accoppiato 6 chiuso o la connessione Bluetooth viene interrotta.
- II TT-BA01 ~ in grado di essere utilizzato
durante la carica.
lampeggla costantemente fino a quando la carica 6 finita. Per evitare confusione quando – 54 –
si carica e si utilizza allo stesso tempo, consigliamo di accoppiare il dispositivo prima, e poi avviare la carica.
- Ripristinare
A volte, il TT-BA01 si rifiuter~ di accoppiare con altri dispositivi anche se 6 in modalit~ di accoppiamento con lampeggiata del rosso e blu. In questo caso, 6 necessario reimpostare il Trasmettitore per renderlo fresco e di voler accoppiare nuovamente.
Per ripristinare il Trasmettitore:
- Accendere il Trasmettitore
- Premere dobbio il pulsante di pontenza. • Spegnere ilTrasmettitore
Potrebbe essere necessario provare un paio di volte se non funziona al primo tentative.
Cura e Manutenzione
Si prega di leggere I seguenti suggerimenti per rnantenere il Suo prodotto in funzionamento per un lungo tempo a venire.
Non posizionare direttamente il prodotto alia luce solare o negli ambienti caldi. Elevate temperature potrebbero abbreviare la durata della vita del trasmettitore.
Non tentare di smontare il prodotto. Potrebbe causare gravi danni.
Non far cadere o buttare il trasmettitore su superfici dure perch6 potrebbe causare la danneggiata di circuito interno.
Non usare prodotti chimici o detergent per pulire il prodotto.
Non graffiare la superficie con oggetti appuntiti.
FAQ
Q: Non posso accedere il trasmettitore.
A: Si prega di ricaricarlo e assicurarsi che il TT-
BA01 ha una carica sufficiente. Rendere ricaricarsi e vede se il LED diventa rosso.
Q: Ho dei problerni dell’accoppiamento e il
collegamento al dispositivo Bluetooth.
A: Si prega di controllare le seguenti fasi:
| calore e umidit~.
|
| Bluetooth supporta A2DR
|
– 55 – – 56 –
| A;
|
| a.
|
- Si prega di confermare che altri dispositivi
Bluetooth sono chiusi.
Si prega di confermare che il TT-BA01 eil Suo dispositivo sono vicini a 1 metro.
I~ necessario di rendere il TT-BA01 entrare nella modalit& di accoppiamento, ci6 che il LED rosso e blu lampeggiano alternativamente.
Potrebbe essere necassario cancellare la memoria. Si prega di leggere “come cancellare la memoria” per le istruzioni.
Q: Non riesco a sentire la musica dal mio
dispositivo dopo aver accoppiato con il mio dispositivo.
A: Si prega di controllare le seguenti fasi:
- Assicurarsi che il trasmettitore ~ collegato
con il player.
- Assicurarsi che il player sta riproducendo la
musica e il volume sia acceso.
Q: Perch~ non si pub accoppiare con il mio smartphone o iPad?
A: II TT-BA01 6 un trasmettitore Bluetooth, non
trasmettitore a un dispositivo generale non-
Bluetooth audio come un kindle Fire, iPod, TV, computer, ecc. Poi accoppiarsi con il Bluetooth cuffie/altoparlante.
Nota: A causa del Bluetooth compressione/ decompressione, ci sara un ritardo in audio/ video. Questo ~ normale tra tutti i tramettitori.
Q: II mio dispositivo lampeggia in rosso.
A: Ci6 significa che la batteria 6 scarica e deve
essere ricaricata al pie presto.
Q: Posso utilizzare il mio trasmettitore mentre si ~ carica?
Si, abbiamo aggiornato il trasmettitore TT-BA01, quindi ora 6 possible utilizzarlo durante la ricarica.
Non ho usato il TT-BA01 per lungo tempo, ora la batteria ~ “morta”, cosa posso fare?
Se I’unit~ non ~ stata utilizzata per pie di 21 giorni, si prega di caricare I’unit& per almeno 4 ore, perch6 la batteria ha bisogno di una carica completa.
Assistenza di Tecnoiogia
Per quanto riguarda I’assistenza di tecnologia, si prega di inviare email a support.it@taotronics. corn con il Suo ordine e la descrizione del Suo problema. Di solito rispoderemmo entro 24 ore.
Per quanto riguarda ulteriore imformazioni, si prega di vedere www.TaoTronics.com.
Offriamo un anno di garanzia sul prodotto dalla data dell’acquisto originale per I difetti di fabbricazione. Se I’apparecchio ~ danneggiato a causa di un difetto di fabbricazione, si prega di contattare immediatamente TaoTronics Supporto (support.it@taotronics.com). L’istruiremmo la restituzione del prodotto difettoso per la riparazione e la sostituzione.
Questi casi non si sono inclusi nella garanzia del prodotto:
- Un prodotto derivato a second mano,
che ~ usato o 6 arrivato dai venditori non
- Danni causati a disastro naturale.
o Danni causati ad alcun partito / persona /
oggetto terzo e altri.
Nessun ritorno sara accettato senza autorizzazione di venditore.
DichiarazJone
Possiamo fornire soltanto i servizi post-vendita per i prodotti che vengono venduti da TaoTronics o TaoTronics autorizzati rivenditori e distributori. Se ha acquisto it Suo apparecchio da un posto diverso, si prega di contattare il venditore per le questioni di ritorno e di garanzia.
autorizatti.
- Danni causati a uso improprio, abuso.
radioattiva, veleno, liquid.
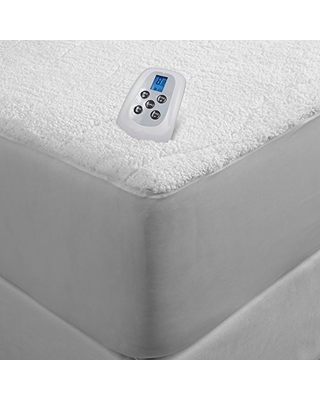 Many reviews focus on if you can feel the wires or not in the mattress pad. The traditional mattress pads run 120 volts moderate sized wires which you can generally feel unless you buy one with allot of padding. While you can feel the wires you quickly forget that they are there. A second type of mattress pad uses very thin wires and low voltage around 20 – 30 volts. With this type of mattress you can literally not feel the wires on your back when you are lying down. Be sure the check the overall wattage, however because this type may not consume as much total power making it heat up slightly slower or not each as high of a temperature.
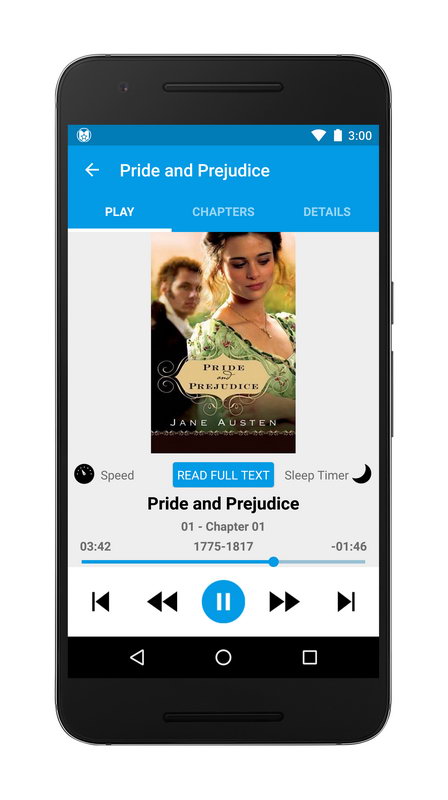
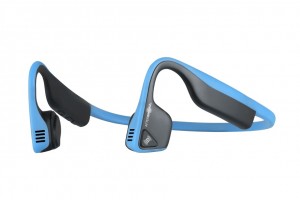 bone conduction headphones or “bone phones”. These don’t cover your ear so you can still hear your surroundings and the bone phones are reasonably loud enough to listen to and enjoy while doing most activities. Personally they are what I end up wearing the most around the house. People around you can hear sound leak out so they are not good for work or other public places indoors unless you turn the volume quite low.
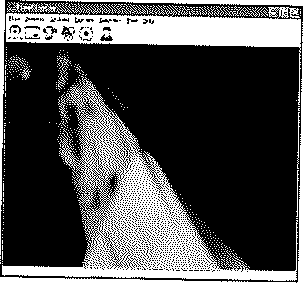
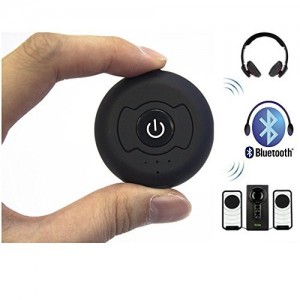 This transmitter had an interesting round design and also worked quite well when I set it up the first time. It would reconnect to Bluetooth headphones reasonably fast within about 5 seconds but not as fast as the Zeo. The downside of this transmitter for me was that I would routinely have the sound cut out about once a minute for a good 5 or 10 seconds. Again, this clearly did not work for me and I kept looking for a better transmitter.
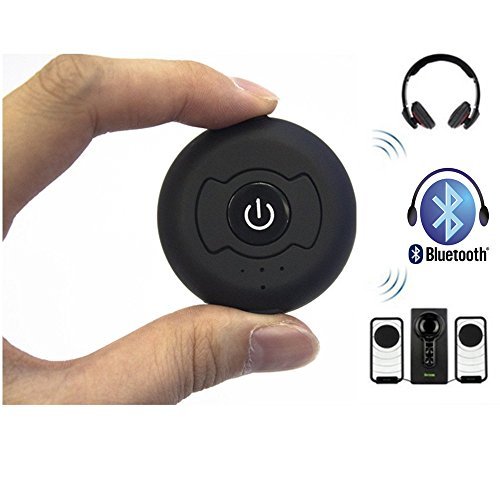


 C1005
C1005  D01
D01  P01
P01 


![B_K]OBRK`$_Y[I(}4)EFKYX](/images/led-msd-lighting/Image_039.jpg "B_K]OBRK`$_Y[I(}4)EFKYX")